Audio Back Channel
The Audio Back Channel plugin is used to create uni/ bidirectional audio communication between different components of the G-Scope environment. Examples for use are:
-
Uni/ bidirectional audio communication between a G-View station and a G-Scope. This form can be used, for example, by train stations, where announcements are passed on via a CCTV workstation to the G-Scopes that are installed there (announcement function).
-
Uni/ bidirectional audio communication between two G-View stations (audio chat function).
-
Simple audio functions such as announcements in shopping centers or acoustic supply with audio multimedia, i.e. not-CCTV-relevant applications (thin audio client function).
Even if the functionality is comparable to professional intercom technology: It has not been designed as such. With a latency time of roughly 500 ms, this is to be expected. The plugin simply makes possible communication between G-View workstations and other devices. This makes a range of interesting applications possible and easy to realize.
The Audio Back Channel plugin is a G-Scope media plugin. At the output side (ABC output) the plugin must be installed in order to output (ABC output) an announcement or audio file over the loudspeakers.
At the input side (ABC input) a G-Core server must be installed that composes the input of the Audio Back Channel. The input source is a microphone or another audio component that is connected to the GESC.
The ABC function is completely independent from the DSP input of the G-Scope. It can therefore also be used when the G-Scope itself do not use any audio inputs.
Installation
Installation is carried out in 2 steps at the input side and several settings at the output side.
ABC Input
If you have not installed a G-Core server at the output side, you must do this now. After that or in general:
In G-Set:
-
Start G-Set and connect yourself with the G-Core server of the ABC output system.
-
Open the selection menu Hardware and create a virtual channel (this can be, for instance, a channel for an IP camera of any type as the channel only serves as a placeholder for the ABC function).
-
Activate Use system audio in the corresponding properties dialog. Thus the audio input of the system is connected with the media channel.
-
Send the setup to the server.
-
Open the selection menu Media channels.
-
Add a virtual media channel. Change the name of the channel to AUDIOBACKCHANNEL.
-
Go to the settings for live streaming.
-
Select HIGH for the audio profile of the live stream.
-
Send the setup to the server. The system now shows an audio channel is available in the network.
In G-View:
-
Open the Profile Manager in G-View.
-
Select the menu Custom buttons.
-
Create a button entitled SPEAK.
-
Set the Action on mouse down to ABC_CONNECT(XXX) and Action on mouse up to ABC_DISCONNECT(XXX). Set the Sent to function to server of selected viewer.
XXX is the IP address or the network name of the input audio system!
-
Save the settings.
ABC Output
Before you configure the device for output, please connect a loudspeaker and test if you can hear audio files with the help of the media player.
-
Copy the ABC plugin (GngAudioBackChannel.dll and GngAudioBackChannel.dlg.dll) to the MediaPlugins subfolder in the G-Core directory, which by default is located in the folder
C:\Programme\Geutebrueck\GCore\MediaPlugins. -
Start G-Set and connect yourself with the G-Core server of the ABC output system.
-
Go to the Hardware dialog.
-
Click on Add and select the ABC plugin from the list of media plugins.
-
Save the settings. It is not necessary to configure a media channel for the plugin.
You must carry through this procedure for each G-Core system that is meant to output the audio of the input system.
Configuration
Click on ABC in the plugin selection menu. The settings window is opened.
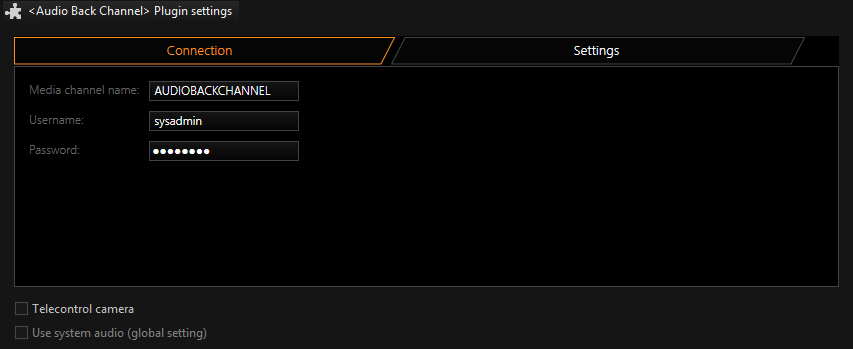
Connection
|
Name |
Description |
|---|---|
|
Media channel name |
This is the name of the audio channel in the audio source system. The standard name is AUDIOBACKCHANNEL. |
|
Username / |
The connection between the ABC plugin and the ABC source server requires a normal G-Core user account. As a standard sysadmin and masterkey is foreseen. If you want to use another user account, you can change the settings here. |
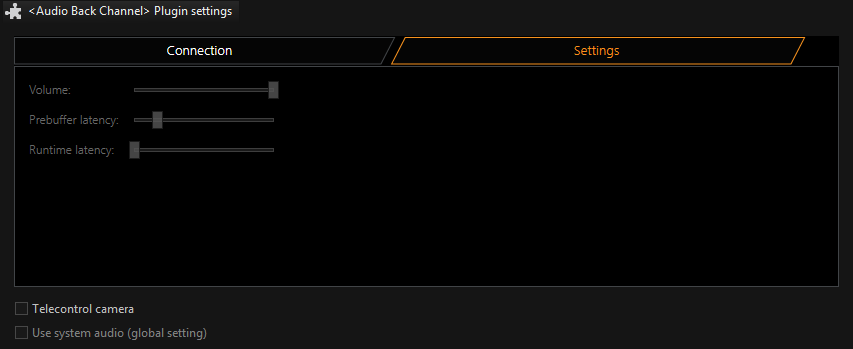
Settings
|
Name |
Description |
|---|---|
|
Volume |
Defines the volume of the audio output. |
|
Prebuffer latency / |
These parameters influence the audio transmission latency. For an undisturbed transmission, a certain amount of buffering is necessary. If the audio transmission is disrupted, then you can reduce the disruptions by increasing the latency time. |