Autobackup
Introduction
Auto-backup is automatic backup version of the G-Core. As the module has been implemented as part of the G-Core server, it performs far better compared to a commercially sold TCP/IP client solution.
Autobackup works with so-called 'Backup Transactions'. 'Backup Transactions'. A 'Backup Transaction' is defined by:
- The start criterion (Clock time or actions)
- The source criterion (Definition of data that needs to be secured)
- The destination criterion (Definition of the destination drive and where applicable an access account on network drives)
With every backup transaction, a new GBF file is created. After starting the transaction, all data is secured in conformation to the source criterion. After that, the backup module returns to stand-by until the transaction must be renewed or (another) started.
A user account as required by the network drive can be specified on the configuration of a new backup translation. GNGBackup then uses this account to report to destination processors during the securing of the backup in order to gain access to the specified drive.
The backup module also makes a function available for the operation of the destination drives: in this way the behavior of the backup can be set in case of lack of capacity (e.g. transmission of the oldest backup data or stopping).
Backup transactions can be started based on the clock time or actions. This way a chosen procedure can be used for the triggering of a backup.
The Auto-Backup-Client can also generate an action on achieving a pre-defined level in the destination medium. With corresponding parameterisation this action can be used for the notification of operating personnel.
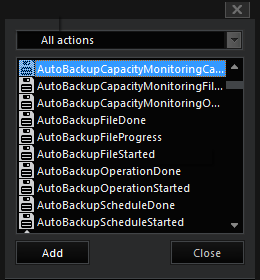
As you read in the chapter Events/alarm, you can automate processes on the system using the commands Start By/Stop By, On Start/On Stop. For backups, there are a number of actions available for use.
The Surface
The surface of the Auto-Backup consists of a tree diagram for giving an overview of the backup transactions created, thereby ensuring quick access to these configurations.
To the right of the tree diagram, there is a page with information on the current selected backup transaction and also the register for settings, sources and destinations.

Settings
The register for settings offers the typical configuration options for a backup: day and clock time of the backup start and duration of the backup.
Furthermore, various sources and destinations, including network drives, can be assigned to the procedure previously registered on the registers for sources and destinations.
Sources
Also the configuration of the sources of the backup offers many possibilities various channels, rings and archive levels can be combined; video and audio or only one of the two can be recorded in the backup. In addition, this is where the desired backup depth is defined.
For more on rings and archive levels, please see Chapter Databank under section .

Destinations
The register of destinations records the various drives for the backup and the access rights to these backup drives. Furthermore, this is where the warning messages and delete procedures are configured.
Settings
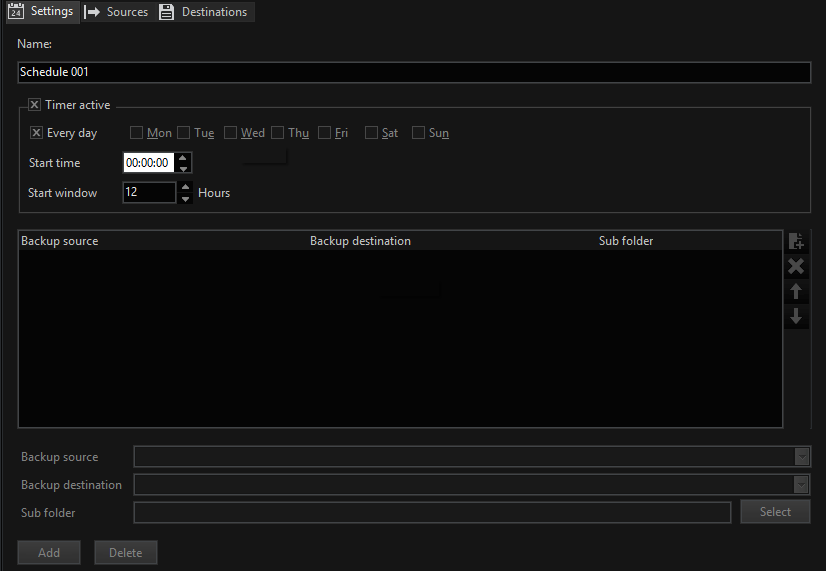
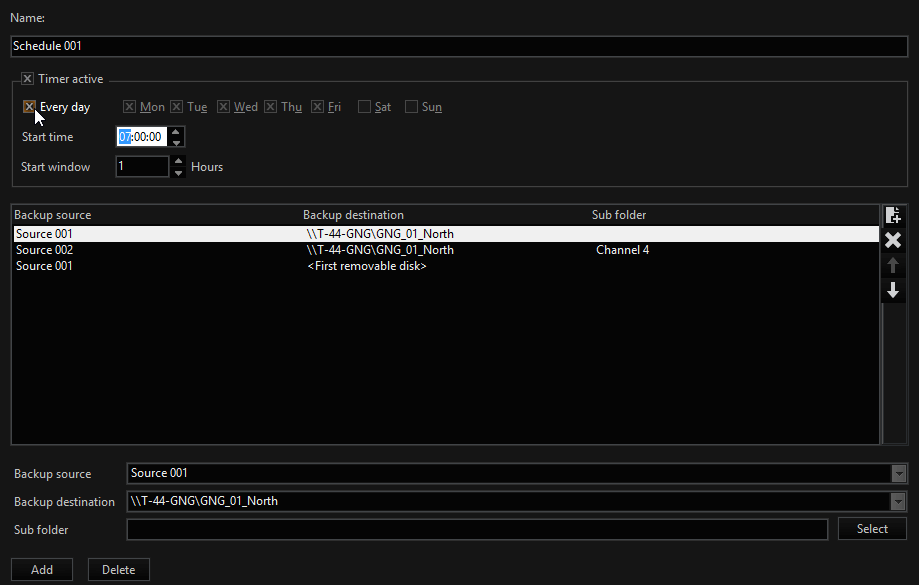
Before being able to find your settings for timed backups on this register card, you need to at least have specified a source and a destination. If you have not done this yet, click on the Sources register (or Destinations) to find your settings and to read more about it.
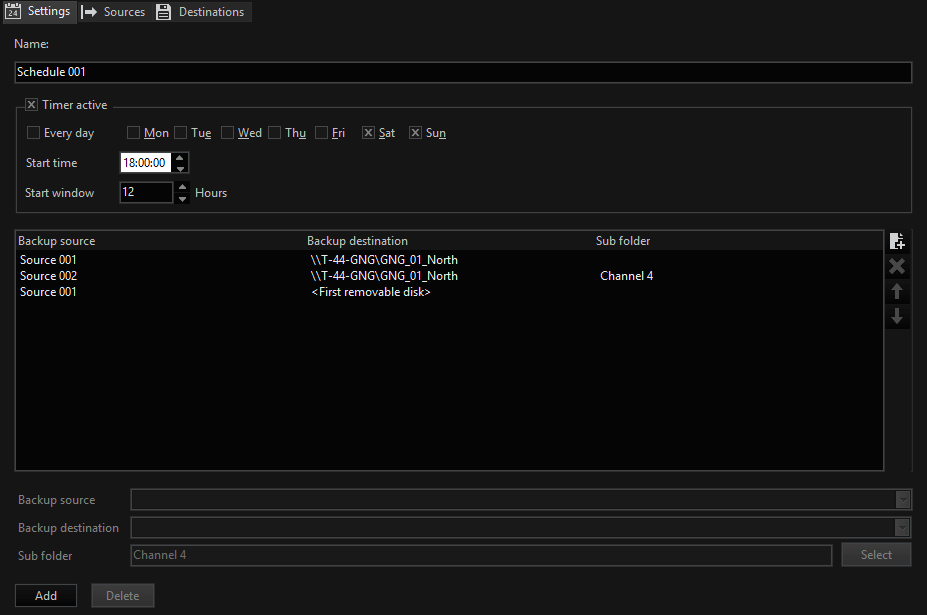
If you have already specified sources and destinations, click on Add to define a backup transaction.
After clicking on Add, a dialogue is opened in which the backup source and backup destination can be selected.

Next, mark a source in the overview and choose between Every day and specific weekdays for the backup.
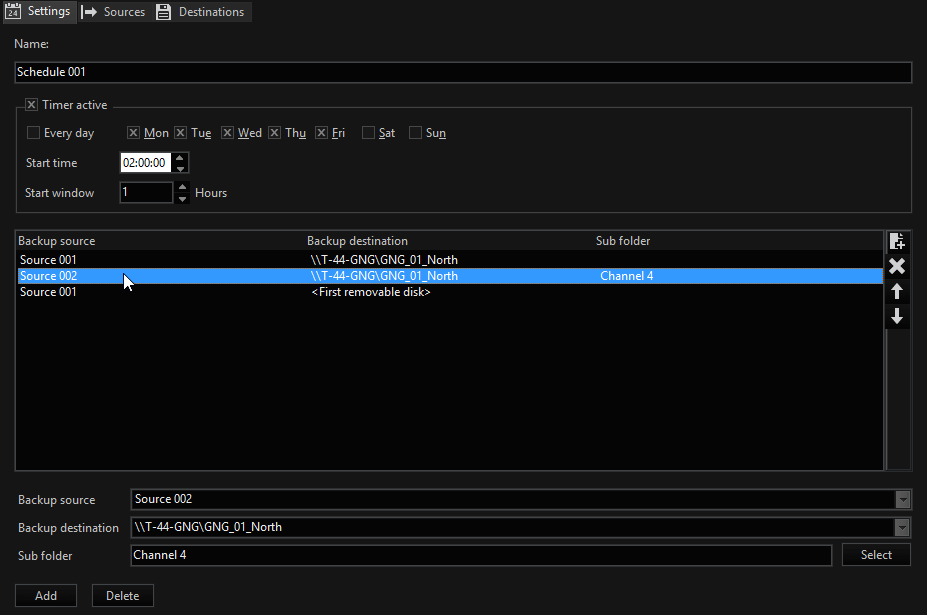
Indicate the start time; in our example this is 2:00 a.m.
Sources
In order to specify a source for the backup, click on Add. You can give an expressive name.
Next mark the desired channel, ring and archive levels.
The previously encountered settings can be further refined. Under Media class you can select whether both video and audio are included in the backup or whether you would only like to secure video or only audio for the given media channels.
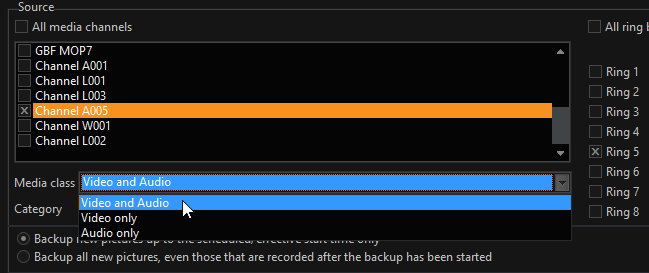
Category provides the possibility to include all categories or only the event records in the backup for the current marked source.

Before completing the source configuration, there are still a few decisions to be made:

|
Parameter |
Description |
|---|---|
|
Backup new pictures up to the schedule / effective start time only |
Activate this option if you only want to include images that were recorded up to the time of the planned/effective start of the backup. |
|
Backup all new pictures, even those that are recorded after the backup has been started |
Activate this option and all new images - including those recorded after starting the backup - will be included in the backup. |
Automatic Backup Depth
|
Parameter |
Description |
|
|---|---|---|
|
Automatic backup depth detection |
Minimum backup depth |
Entering of the minimum backup depth in hours |
|
|
Maximum backup depth |
Entering of the maximum backup depth in hours |
|
Manual backup depth |
Backup depth |
Entry of the backup depth in hours. |
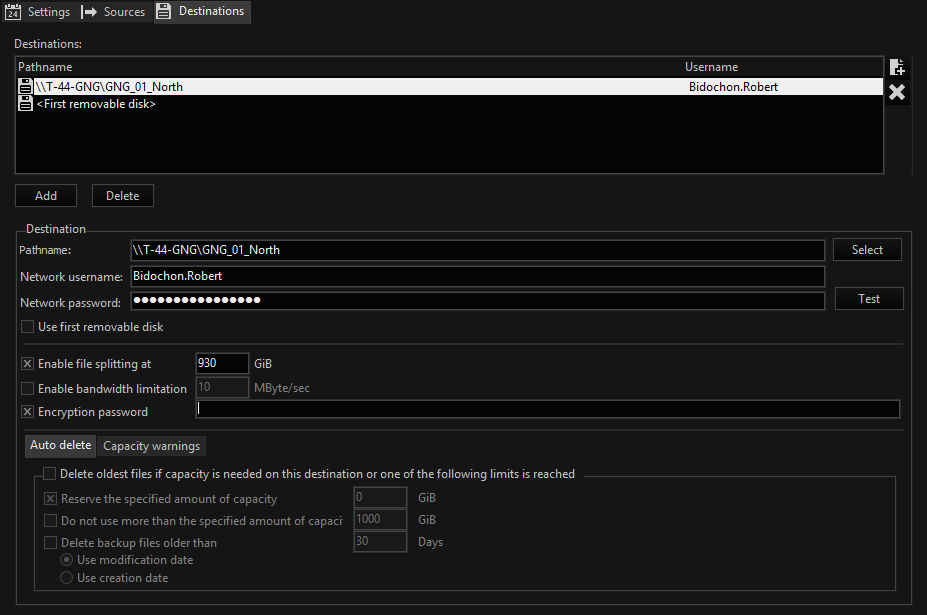
Destinations
The backup files can be saved both locally and on a network drive.
In both cases it should be ensured that the path provided for saving does exist.
Also, do specify the desired directories and paths ahead of time, and ensure too that you have the necessary authorisation for access to network drives, know the user name and have the password.
In order to specify a backup destination, click on Add. A destination dialogue is opened:
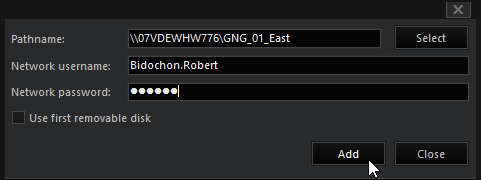
Enter the requested data:
|
Data |
Description |
|---|---|
|
Pathname |
Path to backup directory |
|
Network username |
Entry of username for the above-mentioned backup directory |
|
Network password |
Entry of the password for the above-mentioned backup directory. |
|
Use first removable disk |
If you click on this option, the first removable disk will be automatically selected as the target medium. |
Once the necessary information has been entered, click on Close.
The following settings regarding the destination can be encountered now:
|
Parameter |
Description |
|---|---|
|
Enable file size limit |
Enter the maximum size in GB for the backup file. |
|
Enable bandwidth limitation |
Enter the maximum bandwidth in megabytes per second (Mbps). |
|
Encryption password |
If you would like to encrypt the backup data, enter a password here. |
Auto Delete
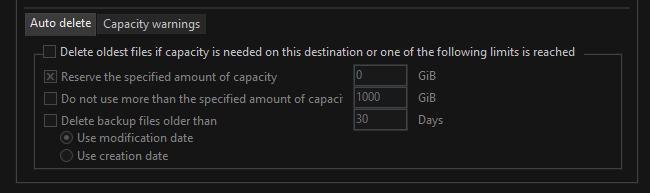
If you would like to make use of the auto delete function, you need to activate Delete oldest files if one of the following limits is reached.
After that you can set the auto delete functions:
|
Parameter |
Description |
|
|---|---|---|
|
Reserve the specified amount of capacity |
Reserves the given capacity in GB |
|
|
Don't use more than the specified amount of capacity |
Do not use more than the specified amount of disk space. |
|
|
Delete backup files older than |
Backup files that are older than the number of days specified here are deleted. |
|
|
|
Use modification date |
Refers to the date on which the modification was made. |
|
|
Use modification date |
Refers to the date of creation |
Capacity Warnings

If you would like to make use of capacity warnings, you need to click on Enable capacity warnings.
You can then choose under what circumstances you would like to be warned:
|
Parameter |
Description |
|---|---|
|
Free capacity level (lower limit) |
Minimum hard disk space in GB that should be kept free |
|
Allocated capacity warning level (upper limit) |
Maximum hard disk space in GB that may be used |