Client Privacy Masking (CPM)
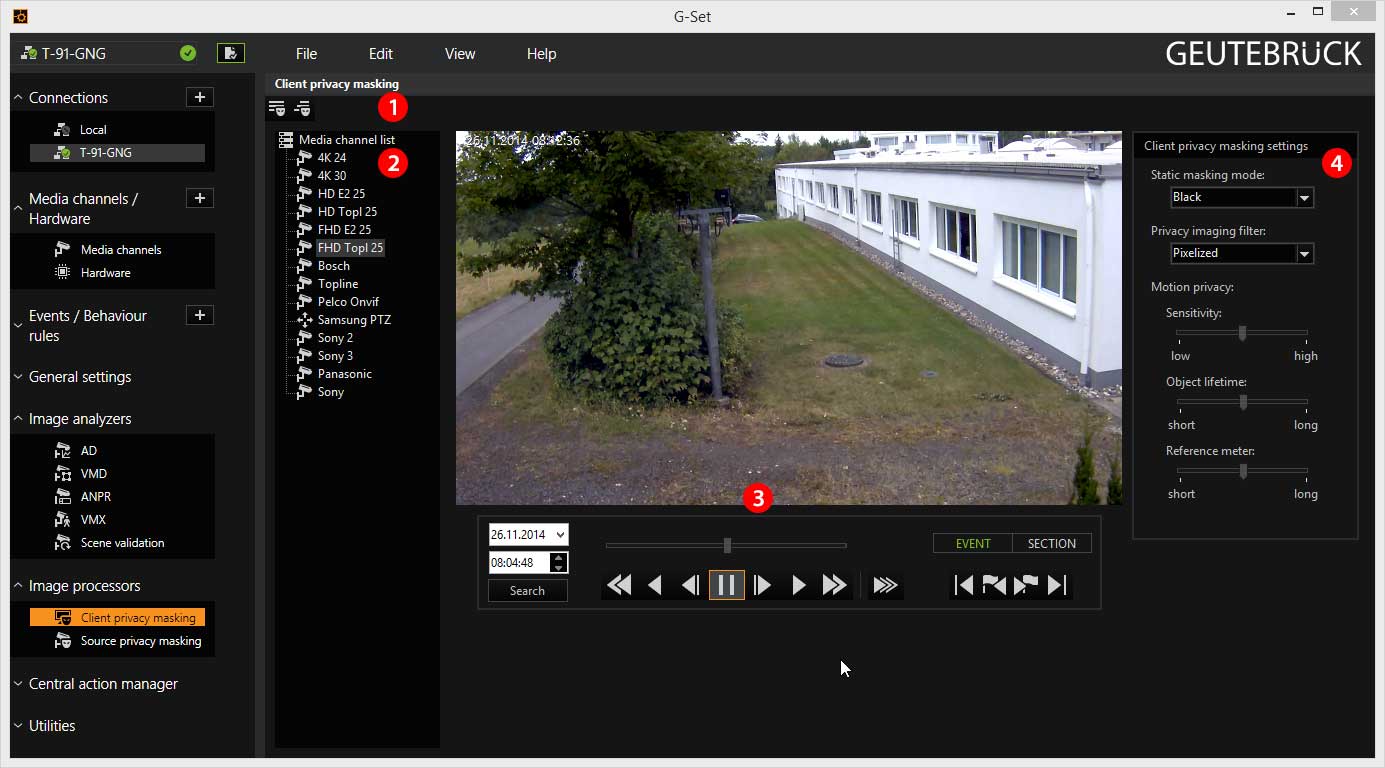
Client privacy masking is chosen in the Image processors selection menu, the setting area changes as shown above:
|
Area |
Description |
|---|---|
|
|
Icon with the selection for For Static privacy masking all portions of the image in the marked zone are hidden, while for Motion privacy masking only the moving parts are pixelized in the image. |
|
|
The list of media channels |
|
|
Viewer for the current media channel in which the privacy masking is drawn and the associated control bar |
|
|
Settings for the CPM |
When the user rights were configured (Image Processors), the areas of the image can be masked.
Static Privacy Masking
Drag the desired media channel onto the viewer.
After activating static privacy marking by clicking on the  icon, you can use the left mouse button to draw the zones in the viewer. These zones are then masked in G-View. More information on drawing zones can be found under Drawing zones.
A drawn zone can be deleted by right clicking and selecting Delete in the pop-up menu. It is also possible to duplicate and copy zones using this method.
According to the (previously) defined settings, the drawn zones will be shown either blacked out or pixelized (refer to Types of Masking ).
Motion Privacy Masking
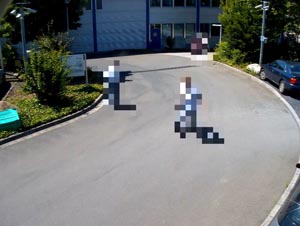
Moving objects in the image should be shown pixelized or blurred. Using Motion privacy, persons can be identified as such, but they cannot be recognized as individuals. The overall impression of the scene is maintained.
|
Pixelized |
Blurred |
|---|---|
|
|
|
|
|
|


Drag the desired media channel onto the viewer.
After activating motion privacy masking by clicking on the  icon, you can use the left mouse button to draw the zones in the viewer. Motion privacy masking zones are orange. These zones are then masked in G-View. More information on drawing zones can be found under Drawing zones.
A drawn zone can be deleted by right clicking and selecting Delete in the pop-up menu. It is also possible to duplicate and copy zones using this method.
According to the (previously) defined settings, the drawn zones will be shown either pixelized or blurred (refer to Types of Masking ).
Special Features of Motion Privacy Masking
For motion privacy masking, some settings are necessary, which can be configured under Motion privacy.
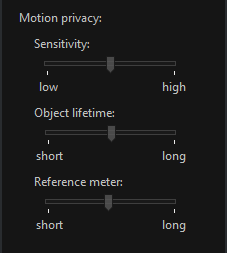
Sensitivity
With the sensitivity control, you determine how fast moving objects are pixelized.
Take a look at the scene. If an object remains recognizable in the scene, move the slider to the right. The object is then pixelized faster.
Object Lifetime
Sometimes, objects that appear in the scene suddenly remain stationary (for shorter or longer periods). These objects are then added to the scene and are no longer pixelized. With the slider, you specify the amount of delay that is used before stationary objects are added to the scene.
Take a look at the scene and ask the persons walking through to stop for a moment. Move the slider to the left (slow) if the persons are added to the image too quickly or to the right when you feel that the object has been in the image long enough and should have been added to the image by now.
Reference Meter
Once you have clicked on this setting, a white line will appear roughly in the middle of the image. The length of the line can be changed using the slider.
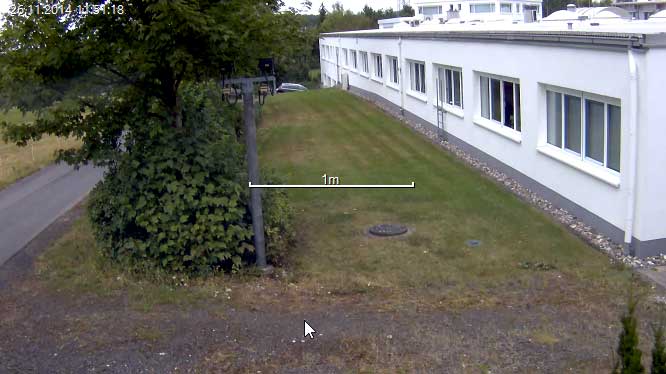
The program uses this "virtual yardstick" for orientation and configures the pixelization accordingly. If the scale is set too large, the pixels are shown too coarsely. In the opposite case, the pixelization is too fine. Under certain circumstances, this can lead to persons or vehicles being identifiable, in particular if you use a low-pass filter.
Find a dimension in the image (window, door, sign, etc.) that is roughly equal to one meter and set the "virtual meter" accordingly.