Image Processors
Using image processors it is possible to mask parts of the image – to black them out or pixelize them.
This electronic privacy function is often prescribed or appropriate to protect personal rights or to secure industrial secrets in situations where video monitoring is necessary.
The picture masking is configured in G-Set and is effective immediately in G-View once the data has been transmitted to the server.
In G-Set the desired image processor can be selected in the Image processors selection menu. You can choose between Client privacy masking (CPM) and Source privacy masking (SPM).

The difference between the two methods is that for SPM the masking is written directly into the database. This means that these parts of the image are always hidden and there is no option for restoring them. Please note: This type of masking can not be used with network cameras!
With CPM, the sections of the image are also hidden when displayed, but it is possible to reconstruct them later from images in the database. The masking also does not apply for all users.
In both cases, there is a change for the setting area, which is slightly more complex for CPM.
Types of Masking
Three different modes can be set for masking:
Black, Pixelized or Low-pass filtered. The default setting is Black.
|
Settings |
Description |
|---|---|
|
|
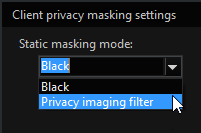
First, under Client privacy masking settings, you decide whether the default setting, Black, should remain in use or whether an image filter will be applied. |
|
|
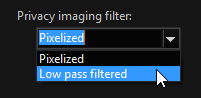
If Privacy imaging filter was set, you can choose between Pixelized and Low-pass filtered. |
Here are the different settings in the view:
|
Mask |
Description |
Example |
|---|---|---|
|
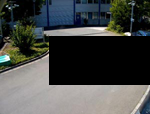
Black |
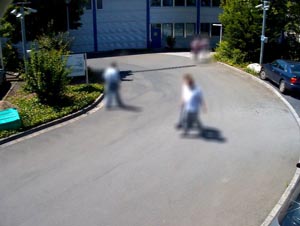
In our example, this selection is not particularly useful, as the entire street is covered by the privacy masking. On the other hand, it illustrates the disadvantage of blacking out for privacy: Large portions of the image are covered even though the objects to be hidden are much smaller. |
|
|
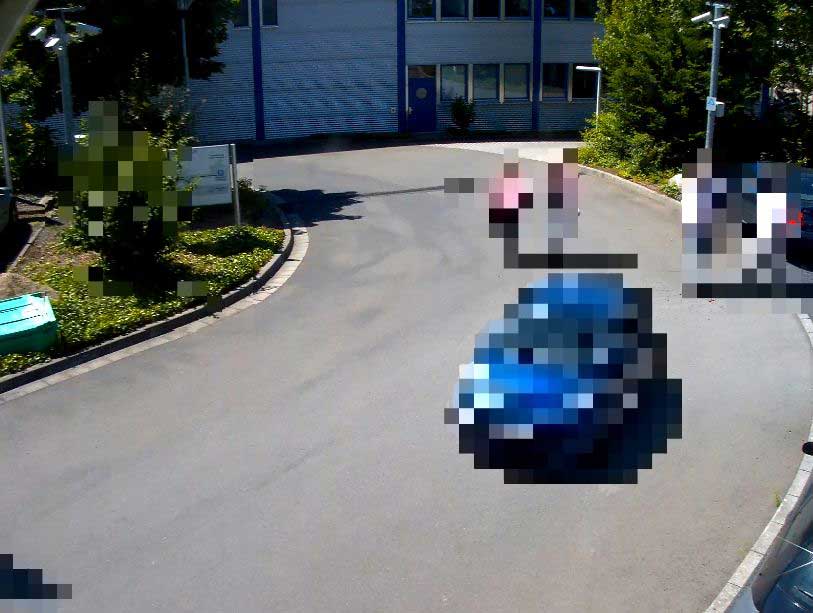
Pixelized |
Here the zone is pixelized. |
|
|
Low-pass filtered |
Here the zone shown is displayed blurred (with a low-pass filter). |
|


Selected areas are blacked out by default. Moving objects in the image should be shown pixelized or blurred. Using Motion privacy, persons can be identified as such, but they cannot be recognized as individuals. The overall impression of the scene is maintained.
|
Pixelized |
Blurred |
|---|---|
|
|
|
|
|
|

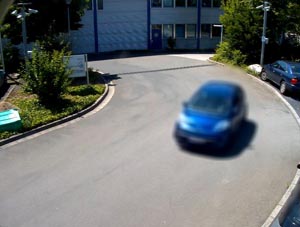

Once configured, all moving objects are hidden. This includes persons and vehicles as well as flags, bushes and trees moved by the wind (on the left in the image).
Before You Begin
An important piece of information first:
If you are logged on to G-View as an administrator, you will not see any privacy zones in CPM, the images remain fully visible. This feature cannot be used for administrators. If you have not created any other users aside from the administrator, you must first create one to activate CPM.
Configuration takes place in G-Set in two steps: Setting user rights and drawing the zones for the static masking and/or motion masking.
Setting the User Rights in G-Set
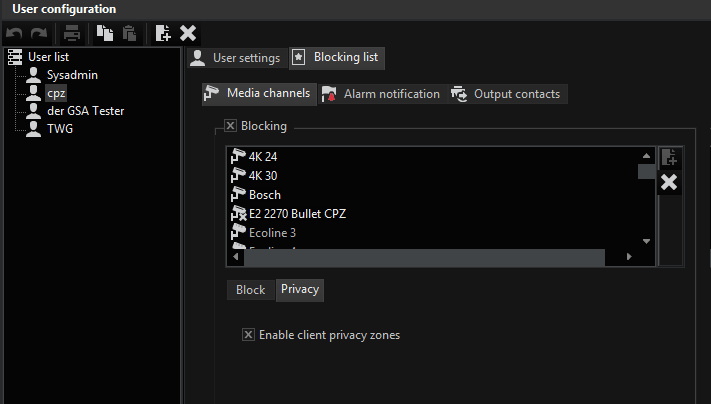
Open G-Set and then in General settings open the User configuration-> User.
Select the desired user (in our example the user cpz) and activate on the Blocking tab the selection field Blocking.
Now go to the Privacy tab and activate the selection field Enable client privacy zones.