Hardware Settings
To add hardware modules: Click in the selection menu Media Channels / Hardware on Hardware and right click in the Hardware Module List. In the list that appears, mark all desired modules and click Add. The modules can now be found in the hardware list.
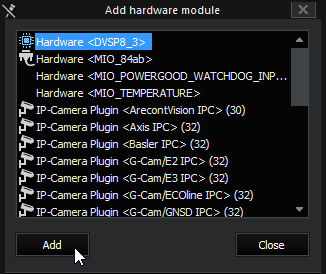
Then click on a module in the list to configure it.
DVSP8
IMPORTANT: DVSP8 and DVSP16 devices are not supported on Windows 10 and Windows 11 if the Secure Boot option is activated.
The DVSP8 driver can be selected in the G-Core installer. It is deselected by default. If you run the silent installer, you must start it with the command line parameter /AllowDVSP8 to install the DVSP8 driver.
If the Secure Boot option is activated on Windows 10 or Windows 11, the driver cannot be installed. If the Secure Boot option is activated on an already installed machine, the DVSP8 driver will not be loaded when Windows starts.
The switch driver for the internally installed network switch can also be selected in the installer. It is deselected by default.
For each channel there are three tabs for configuration in the plug-in dialog:
- General
- Picture control
- Audio
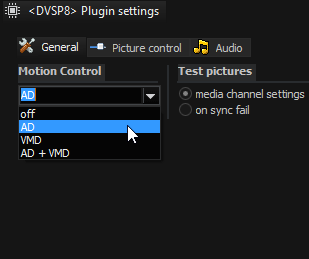
General Tab
|
Motion control |
|
|
Off |
The motion control is switched off for this channel |
|
AD |
Switch the AD on/off for this channel |
|
VMD |
Switch the VMD on/off for this channel |
|
AD + VMD |
Switch the AD and VMD on/off for this channel |
|
|
Note: By default, AD is activated, as well as Activity mode. |
|
Test pictures |
|
|
media channel settings |
corresponds to the setting of the media channel |
|
on sync fail |
On for sync fail |
|
Expert |
|
|
4-CIF-Blending |
Reduces picket-fence effects in 4-CIF images by averaging/blending the two half-pictures. The images become less clear, but the picket-fence effects disappear |
|
Max. bitrate |
Ensures that an (internal) maximum bitrate is not exceeded. For this purpose, the images are limited to approx. 80-100 kByte. |
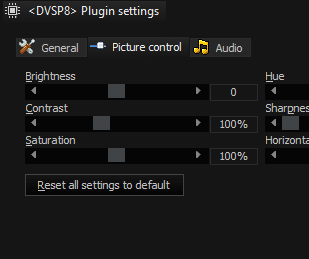
Picture Control Tab
|
Button |
Function |
|---|---|
|
Brightness |
Brightness |
|
Contrast |
Contrast |
|
Saturation |
Saturation |
|
Hue |
Color |
|
Sharpness |
Sharpness |
|
Horizontal Position |
Using Horizontal Position the image can be aligned horizontally by a few pixels (+8/-8) |
By clicking Reset All Settings to Default, all picture control settings are reset to the default values.
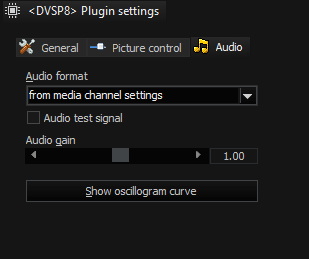
Audio Tab
|
Button |
Function |
|---|---|
|
Audio Format |
Format in which audio will be recorded. The settings under Audio Format overwrite the audio profile setting, as here more formats can be selected. |
|
Audio gain |
Amplification of the audio signal |
The audio oscilloscope mode is only activated by pressing the Show Oscillogram Curve button.
This mode is automatically deactivated after 1 minute, but it can be turned back on by pressing the button again. The mode is deactivated immediately when the dialog is exited.
Temperature Monitoring
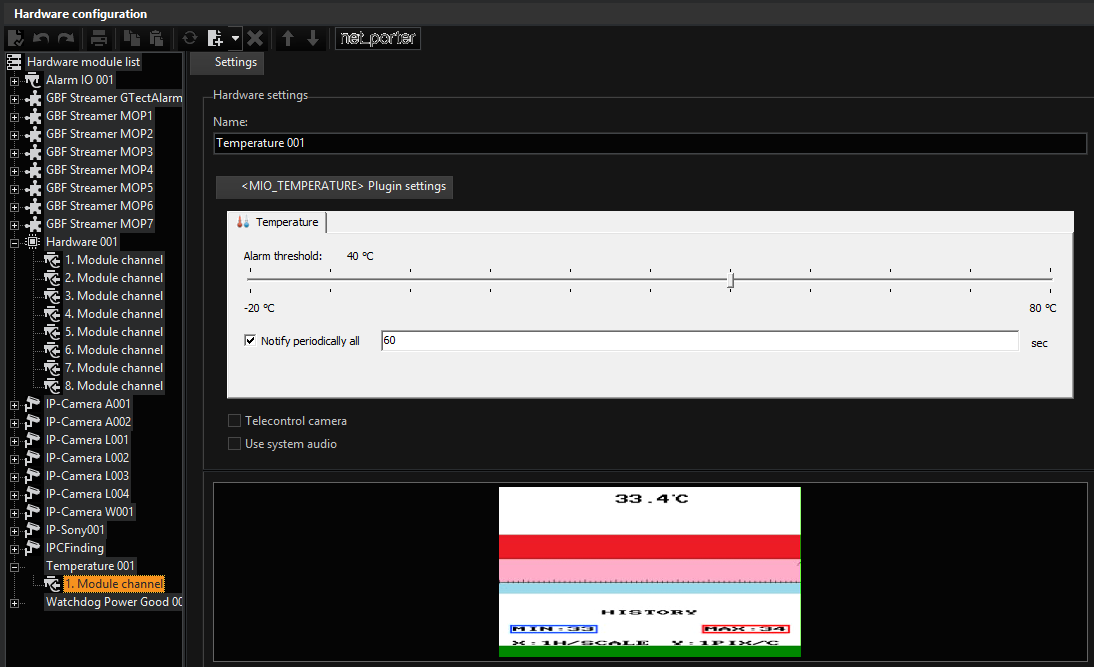
Clicking on Temperature XXX will open the associated dialog.
There, where you would normally see a camera image, you will see the current temperature.
Using a slider, you can set the Alarm Threshold. When the set temperature is reached an action is issued as a warning.
If you want, you can also specify the interval for messages (Notify Periodically Every ... Seconds).
Watchdog
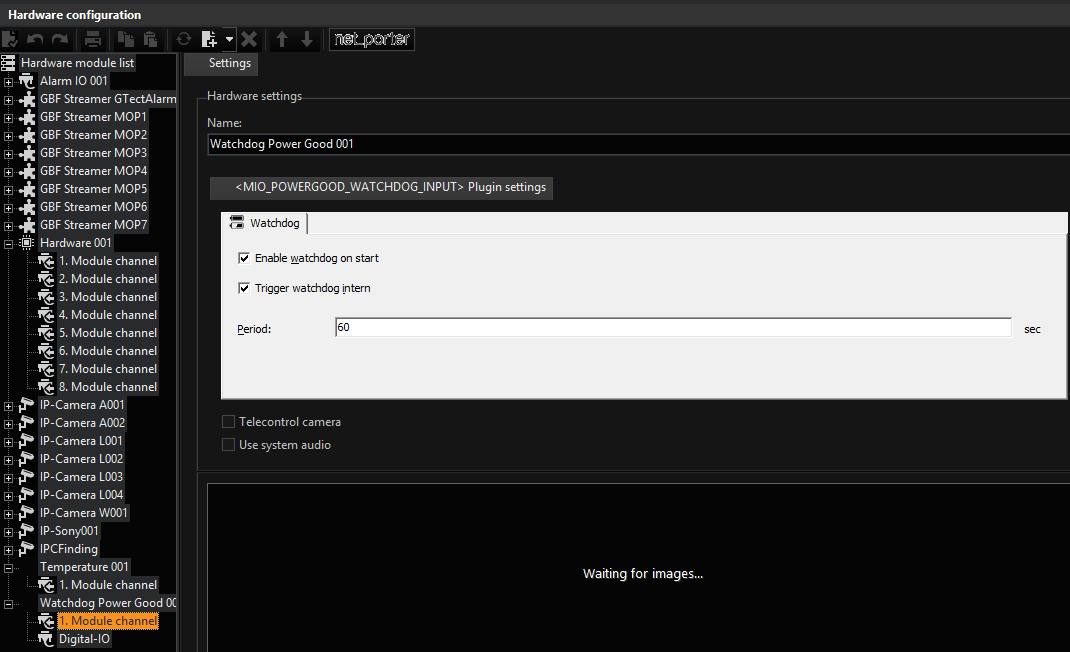
Watchdog Power Good supports you with problems with redundant power supplies. Normally, you would not notice when one of the redundant power supplies fails, as the machine continues to run. In the worst case, both power supplies could fail.
Watchdog Power Good issues an action as notification once one of the redundant power supplies fails.
Alarm IO Display
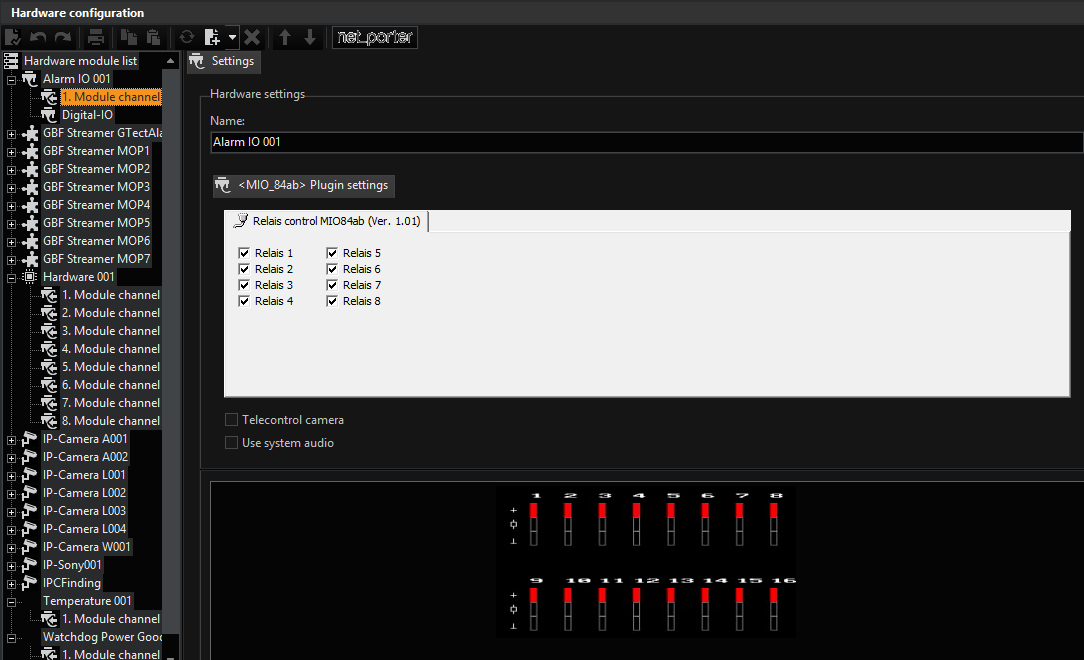
In the alarm IO display, the current status of the digital IO contacts is presented.