Media Channels
Settings
If you click on a channel in the Media Channel List, the settings will be displayed.
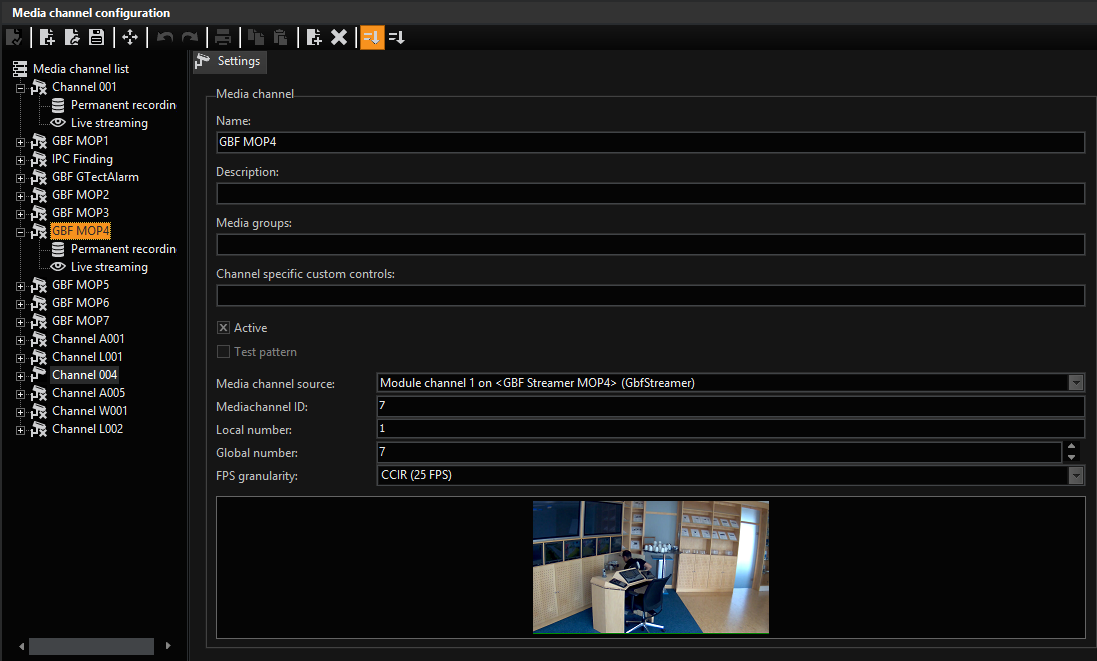
These general settings affect:
|
Setting |
Function |
|---|---|
|
Name |
You can give the media channel a useful name |
|
Description |
Possibility for an explanation, for instance regarding the function of the media channel |
|
Membership to a |
|
|
The associated adapted |
More on the custom controls can be found under G-View – Profile Manager |
|
Media channel source |
Selecting the source |
|
Media channel ID |
The ID of the media channel |
|
Local number |
The local number of the media channel |
|
Global number |
Settings of the global number |
|
FPS granularity |
See below, under FPS Granularity |
If you click on the x in front of the media channel, you can also change the settings for Permanent Recordingand Live Streaming
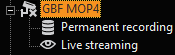
FPS Granularity
Select the video standard you want to work with here by opening the option field with a click. It is set to CCIR at the factory.
Permanent Recording
Click Permanent Recording to activate recording and the specify the desired settings.

The settings are made for the time range Rest of time, which is the default setting.
If you want to set the permanent recording for a different time range, add the time range to the media channel (see Add to Media Channel). This also applies for live streaming.
The settings for the video and audio profile are the settings made in the selection menu Quality Profiles.
Interval indicates the recording rate, which you can set either in seconds or as frames/seconds.
Under Additional Settings you specify the recording ring buffer and the archive level.
Live Streaming
Click Live Streaming to perform the desired modifications.
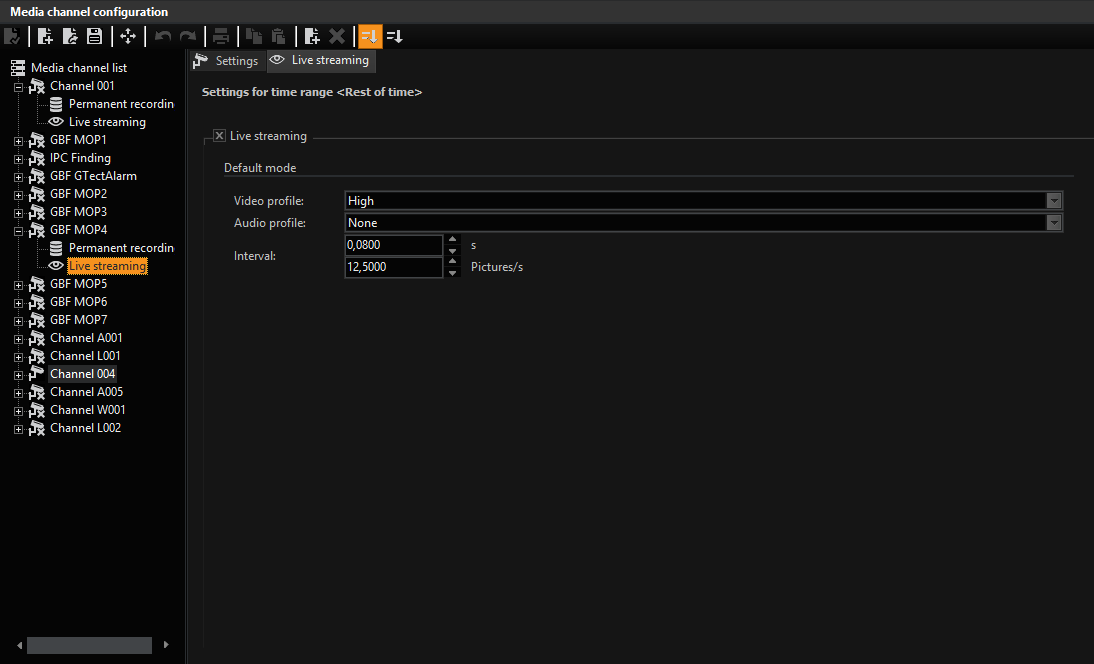
The settings correspond to those for the permanent recording (see above)
Activity Mode
The section Activity Mode ONLY refers to devices with DVSP8!
Let's take another look at the setting for the permanent recording:
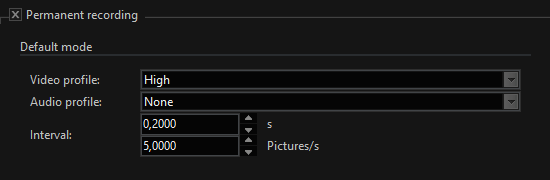
In the above setting, 5 frames/second are permanently recorded at high quality. This recording will take place regardless of whether there is activity in the monitored area.
Example In an office wing, the hall is monitored by a camera. Because no time range is configured, 24-hour recording takes place at 5 frames/second.
This form of recording has the disadvantage that over time, substantial disk space is required for the database.
As an alternative display for the time ranges in which NO movement is detected, the following setting is an option: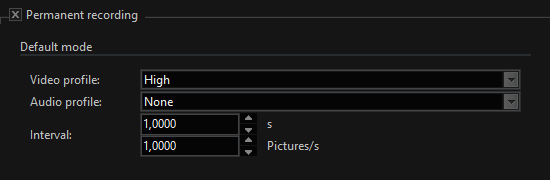
At only 1 frame/second, 80% less disk space is required. If we also lower the quality profile, the disk space savings would be even greater.
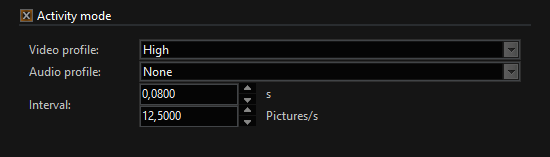
Activity Mode
But what happens when motion or a change in contrast is detected? This is where Activity Mode comes into play.
In case of a trigger via AD/VMD/audio, a switch is made to activity mode and for the set duration (see AD/VMD or event configuration), the recording rate selected here is used.
The joint configuration of permanent recording and activity mode saves disk space and delivers high picture and sound quality in case of detection.
Transcoding
Video transmission over IP networks is standard on current video security systems. In video security systems, however, multiple cameras are almost always used and transmitted, to be able to better judge critical situations from different angles. When transferring images from multiple cameras, bandwidth limitations are a critical factor. At display operator stations several live streams must also be processed simultaneously.
The Geutebrück systems limit the bandwidth and processing power requirements for the live images to a minimum. This is achieved by restricting the image transfer to the actual needs and by transmission of image data in the correct display resolution.
With this method, known as a dynamic live streaming (DLS), by eliminating the transmission of redundant data, the data volume can be reduced by 50 percent and more, without a noticeable loss in image quality. This reduction in data quantity means that the bandwidth and processing capability requirements are also lowered.
You have the option of transcoding JPEG to H.264CCTV using the transcoder settings. Thus DLS is also available for cameras that do not usually support it.
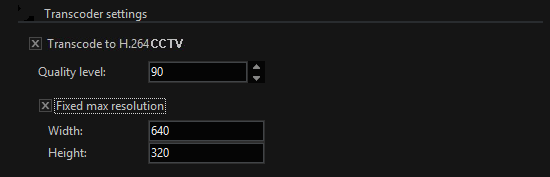
The quality profile for transcoding JPEG to H.264CCTV is set in the JPEG profile. The rule is simple: A higher quality JPEG also leads to a higher quality of the transcoded images.
If you activate transcoding, which is an option both for permanent recording and for live streaming, JPEG images are transcoded to H.264CCTV, which not only allows greater compression rates. For live streaming, the compression is also modified to the current viewer size.
Quality Settings and Image Size
Both in the live stream and for permanent recording, with transcoding activated you can also control the quality settings. To do so, select the desired value at Quality Level.
It is also possible to set the image size for special applications. To do so, select the Fixed Max. Resolution field and enter the desired value.