Alarm Setup Wizard
The Alarm Setup Wizard helps you to create and set up alarm templates as well as NVR and GeViSoft event-based alarm instances.
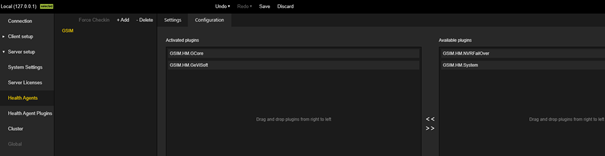
If no health agent exists in G-SIM yet, the Alarm Setup Wizard creates a new health agent, adds the default plug-ins to it, and adds all the sites to be monitored by this agent.
If at least one health agent already exists in G-SIM, the Alarm Setup Wizard activates the G-Core and GeViSoft default plugins for this health agent.
During its work, the Alarm Setup Wizard uses the first health agent of the "Health Agents" list as the default agent for the NVR and GeViSoft event-based alarm instances.
Starting the Wizard
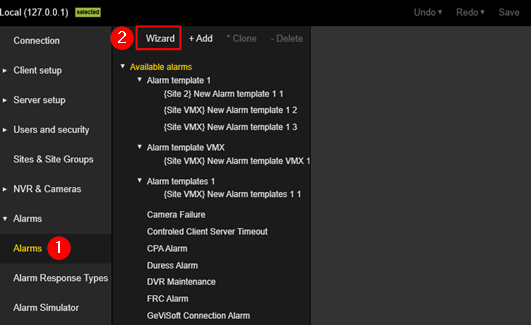
In the Alarms view (![]() ), click the Wizard button (
), click the Wizard button (![]() )to start the Alarm Setup Wizard.
)to start the Alarm Setup Wizard.
The start page of the Alarm setup wizard opens. It contains brief information about the Alarm Setup Wizard.
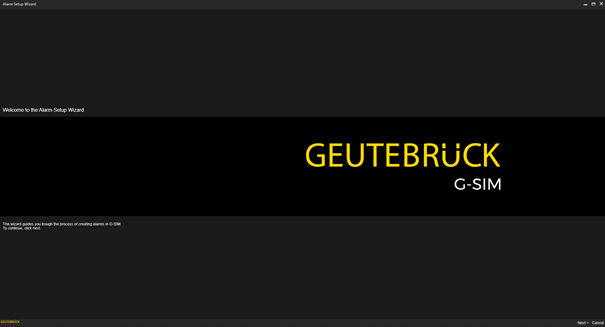
Click the Next button to continue.
Navigation in the Wizard
The Alarm Setup Wizard divides the entire process of creating and setting up alarms into simple steps. It consists of several consecutive dialog windows.
For navigation between pages, each dialog window contains the following buttons in the bottom right corner:

| Name | Description |
|---|---|
| <Back | Click this button to go to the previous page. |
| Next > | Click this button to go to the next page. |
| Cancel | Click this button to close the wizard and discard the changes. |
Create and Edit Alarm Templates
In the Add Alarms dialog window you can create new alarm templates or edit existing alarm templates.
Select Alarm Templates
By default, all alarm templates generated by the plugin are in the Predefined Alarms list. These predefined alarms are not displayed in the following dialog windows.
To be able to configure alarm templates in the following dialog windows, you have to select them. To do this, move the corresponding alarm templates to the Alarms to Configure list.
You can move the alarm templates between the Alarms to Configure and Predefined Alarms lists using drag and drop or the ^ Move and v Move buttons.
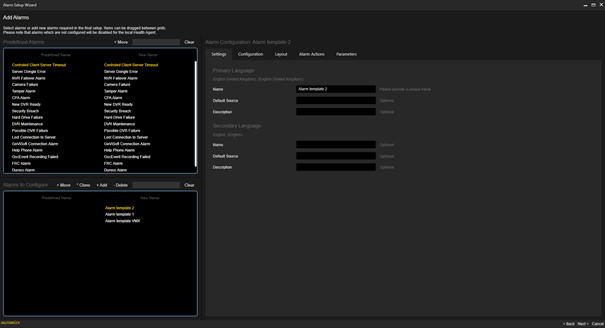
To activate the Next > button, at least one alarm template must be included in the Alarms to Configure list.
The alarm templates must not have any validation errors. If there are any validation errors, they will be displayed with a red dot at the corresponding position.
Configuring the Basic Settings
Click the Configuration tab and select an alarm template from the Alarms to Configure list.
Configure the basic settings. For the Select presentation mode setting, select the Tab View option.

Select Layout
Click the Layout tab and select a layout for the alarm display in the tab view.
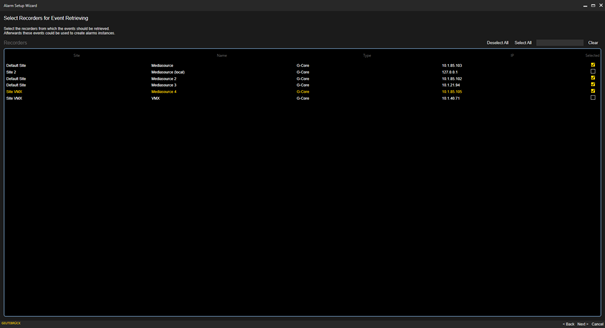
Select Recorders for Event Retrieving
In the Select Recorders for Event Retrieving dialog window, select the G-Core or GeViScope media sources (recorders) from which to retrieve events.
You can then use these events to create alarm instances.
Add Recorder Alarm Instances
In the Add Recorder Alarms Instances dialog window, you can create alarm instances based on recorder events.
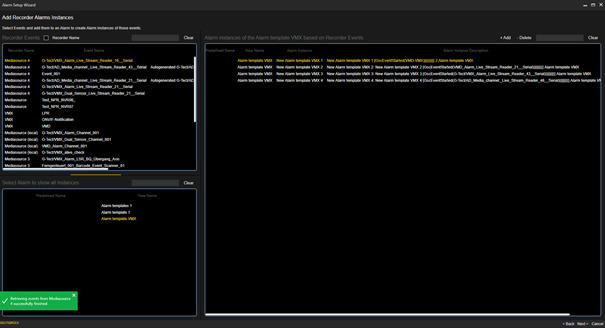
The dialog window consists of the following three lists:
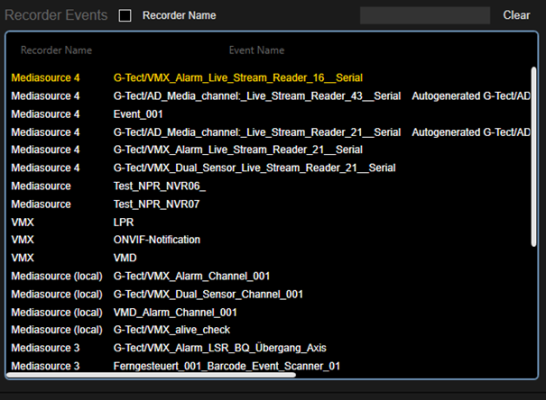
Recorder Events
The Recorder Events list contains the events retrieved from the selected G-Core or GeViScope media sources (recorders).
You can group the events by recorder name or filter by events using the search bar.
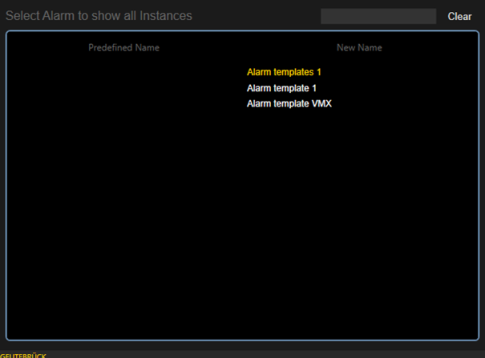
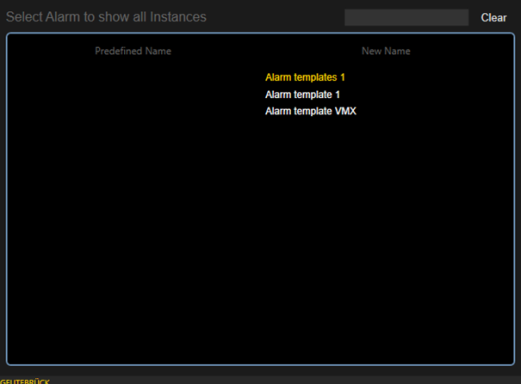
Select Alarm to show all Instances
The list Select Alarm to show all Instances contains all configurable alarm templates.
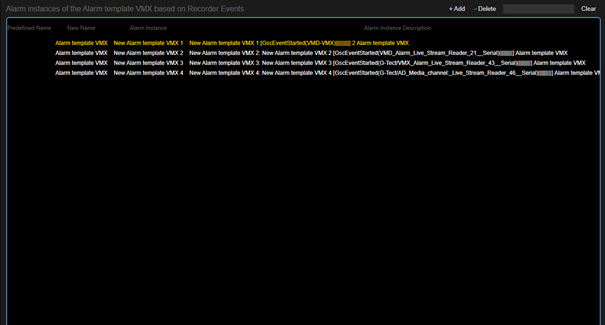
Alarm instances of the Alarm template based on Recorder Events
The list Alarm instances of the Alarm template based on Recorder Events contains the alarm instances of the selected alarm template based on recorder events.
Events used in the alarm instances of the selected alarm template are not displayed in the list of recorder events.
Create Alarm Instances
To create new alarm instances for a selected alarm template, you must select an alarm template and add events:
1. Select an alarm template from the Select Alarm to show all Instances list.
2. Filter the Recorder Events list for the events you want to add to the list of alarm instances.
3. Add the selected events to the Alarm instances of the Alarm template based on Recorder Events list by clicking the + Add button or by drag and drop.
To delete alarm instances for the selected alarm template, drag and drop the selected alarm instances to the Recorder Events list or click the - Delete button.
The cameras associated with the particular event are added to the alarm instance. The primary camera of the event is added to the alarm instance as the primary camera. Also, the live playback mode for this camera is set. Additional cameras are added with Live and Pause playback modes.
If more than one agent is monitoring the location of the selected event media source, alarm instances are created for each agent. If no agent is monitoring the location of the selected event media source, the first agent's list of monitored locations is expanded to include the location of the selected event media source, and an alarm instance is created for that agent.
The G-Core default plugin is added to each agent for which an alarm instance is created.
Add GeViSoft Alarm Instances
In the Add GeViSoft Alarm Instances dialog window, you can create GeViSoft event-based or alarm-based alarm instances.
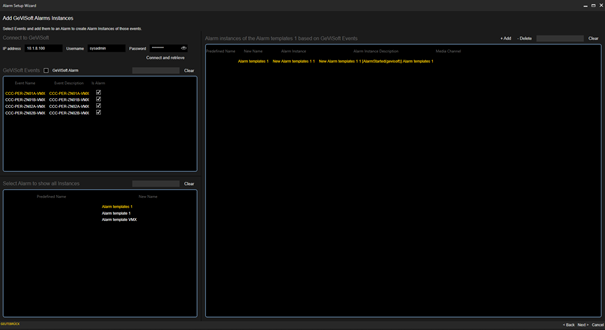
The dialog window consists of the following three lists:
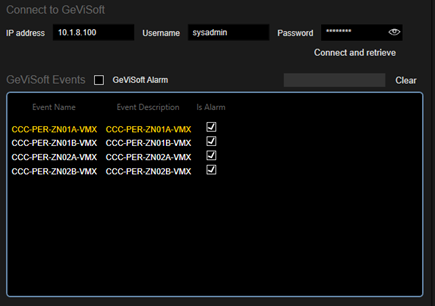
GeViSoft Events
The GeViSoft Events list contains all events and alarms retrieved from the connected GeViSoft server.
You can group the list by alarms or events as well as filter by alarms or events using the search bar.
Select Alarm to show all instances
The Select Alarm to show all instances list contains all configurable alarm templates.
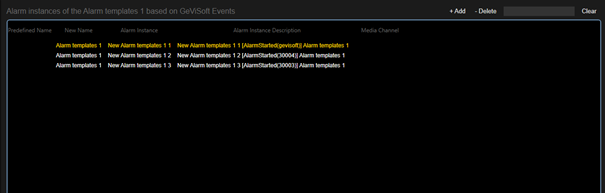
Alarm instances of the Alarm template based on GeViSoft Events
The Alarm instances of the Alarm template based on GeViSoft Events list contains the GeViSoft event-based or alarm-based alarm instances of the selected alarm template. Events or alarms that are used in the alarm instances of the selected alarm template are not displayed in this list.
Create Alarm Instances
To create new alarm instances for a selected alarm template, you must select an alarm template and add events or alarms:
1. Select an alarm template from the Select Alarm to show all Instances list.
2. Filter the GeViSoft Events list for the events or alarms you want to add to the list of alarm instances.
3. Add the selected events to the Alarm instances of the Alarm template based on GeViSoft Events list by clicking the + Add button or by drag and drop.
To delete alarm instances for the selected alarm template, drag and drop the selected alarm instances to the GeViSoft Events list or click the - Delete button.
The created alarm instance is associated with the first agent and the first monitored location of this agent.
Configuration of the Alarm Instances
In the Alarm Instance Configuration dialog window you can configure the created alarm instances.
To do this, select an alarm instance from the Alarm Instances list. You can group the list by the alarm template names as well as filter it using the search bar.
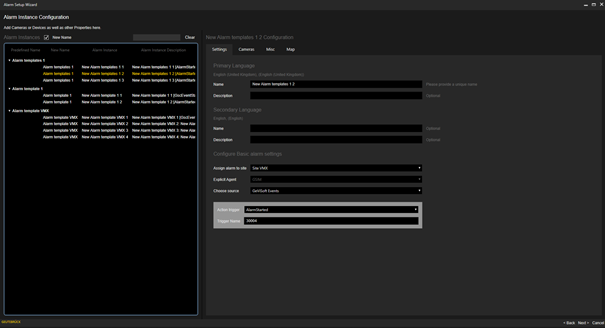
The Next > button is disabled if an alarm instance has validation errors.
Finishing the wizard
When you have finished the configuration, the last page of the wizard opens. Click the Finish button to close the wizard and apply the changes made to the current G-SIM setup.