GIS Maps
Subject to license
GIS maps enable the use of georeferenced map material from Open Street Maps and Google Street Maps and the display of the cameras or other objects on this map material. This saves time when placing the cameras on a map: If coordinates are already stored on a camera, it (or all selected objects) can simply be switched to the correct position.
The alignment of the cameras or map objects can be set manually, just as with a normal map.
To get access to the functionality of GIS Maps, check if the license Allow use of GIS Maps is available (see Server Licenses). If this license is not available, the + Add GIS button (see List of GIS Maps) and the Location tab (see Map Object Settings) will be hidden.
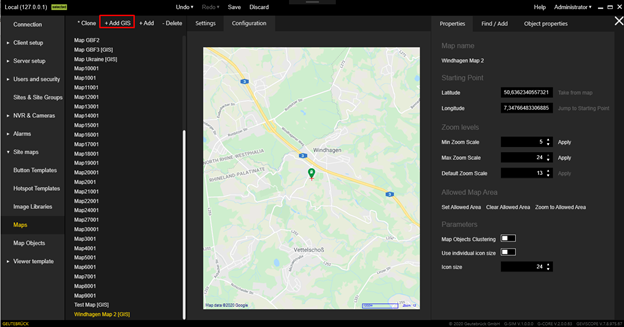
List of GIS Maps
The GIS maps are marked with the suffix [GIS] in the map list of the Maps view to distinguish them from the normal maps. Also, the additional + Add GIS button is available in the toolbar.
Add a GIS Map
To add a new GIS map, click the + Add GIS button. The suffix [GIS] is automatically added to the name of the GIS map.
Clone a GIS Map
To clone the currently selected GIS map, click the * Clone button. The following settings of the original GIS map are applied to the cloned GIS map:
-
Starting point
-
Zoom levels
-
Allowed map area
-
Map objects
The name of the cloned GIS map is restricted to the name of the original GIS map including suffix to ensure a unique name.
Settings
In the Settings tab you can set the name of the selected GIS map.
The name must be unique, as it will be used in all views where the map can be selected.

Configuration
The Configuration tab consists of two areas: The GIS Map control area of the selected GIS Map and the configuration area.
In the GIS Map control area the following information of the selected GIS Map can be seen, which can be set in the configuration area:
-
 Current center of the map view (small red cross mark)
 -
 Starting point of the map view (green marker)
 -
 Name of the map provider
 -
 Scale
Scale -
 Set zoom level
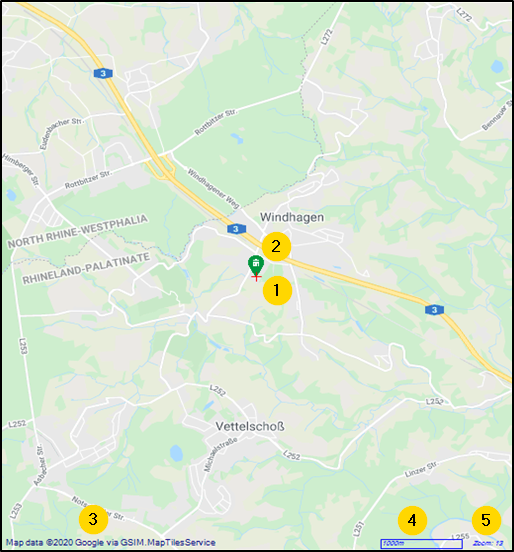
To move the map view, hold down the left mouse button and move the mouse cursor. Use the mouse wheel to zoom in and out of the map view.
The settings in the configuration area are grouped into the following tabs:
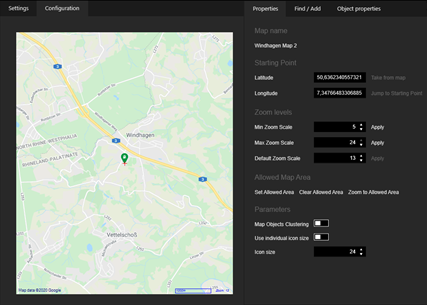
Properties
The Properties tab contains the following settings sections:

Map Name
Displays the name of the selected GIS map.
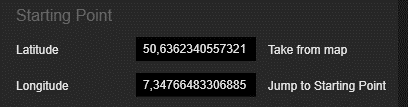
Starting Point
This setting area contains the geographic coordinates (latitude and longitude) of the map's starting point. When the map is opened, it is centered at this starting point.
|
Options |
Description |
|---|---|
|
Latitude |
The specification of the latitude is mandatory. The value should be in the range [-90, 90]. |
|
Longitude |
The specification of the longitude is mandatory. The value should be in the range [-180, 180]. |
|
Take from map |
Click this button to set the current map center point as the starting point. |
|
Jump to Starting Point |
Click this button to center the map at the starting point. |
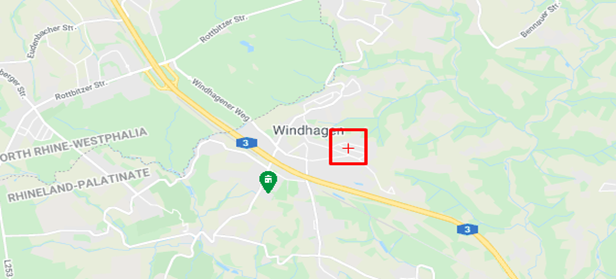
In the map, the starting point is marked with a green icon and the current center point is marked with a red cross:
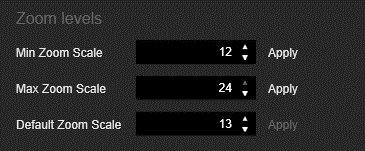
Zoom Levels
In this setting area you can define the values of the zoom levels.
When opening the map, the Default Zoom Scale setting is always applied.
|
Options |
Description |
|---|---|
|
Min Zoom Scale |
Specifies the minimum zoom scaling. The value should be in the range [0, 24]. |
|
Max Zoom Scale |
Specifies the maximum zoom scale. The value should be in the range [0, Max Zoom Scale]. |
|
Default Zoom Scale |
Specify the default zoom scale when opening the map. The value should be in the range [Min Zoom Scale, Max Zoom Scale]. |
|
Apply |
Click this button to apply the corresponding zoom scaling. |
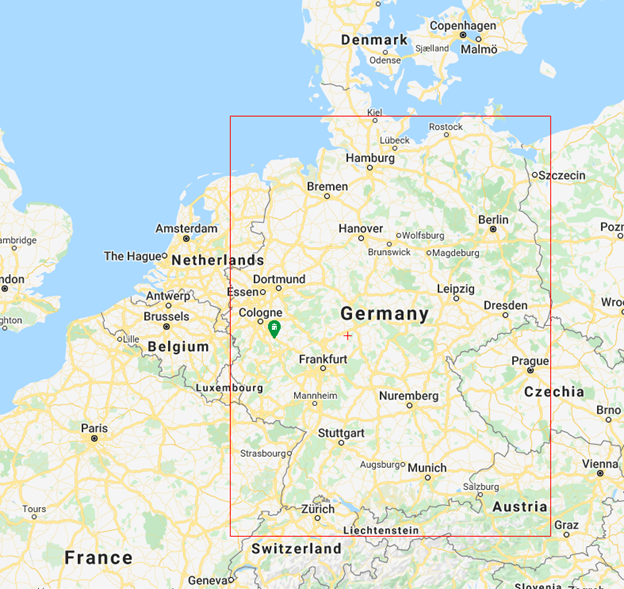
Allowed Map Area
The allowed map area delimits the area in which the user can move and zoom. It is marked with a red rectangle.
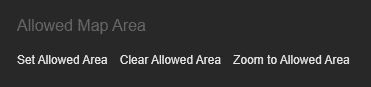
The following buttons are available for editing the allowed map area:
|
Options |
Description |
|---|---|
|
Set Allowed Area |
Click this button to set the allowed map area. |
|
Clear Allowed Area |
Click this button to delete the allowed map area. |
|
Zoom to Allowed Area |
Click this button to zoom in on the allowed map area to be able to check it. |
When you click the Set Allowed Area button, the following dialog box opens:
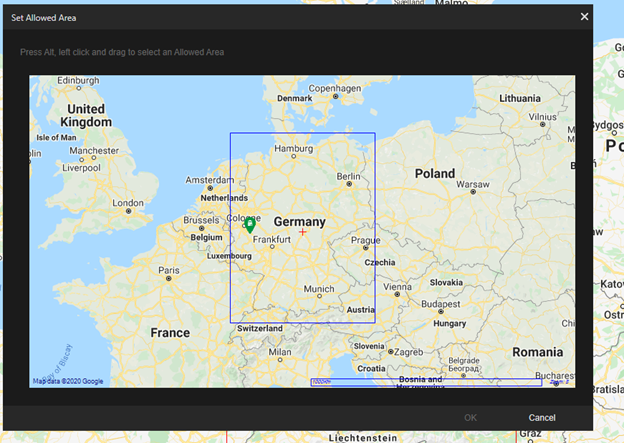
Hold down the ALT-key and the left mouse button and select the allowed map area by dragging the mouse pointer. Click the OK button to apply the changes or the Cancel button to reject the changes.
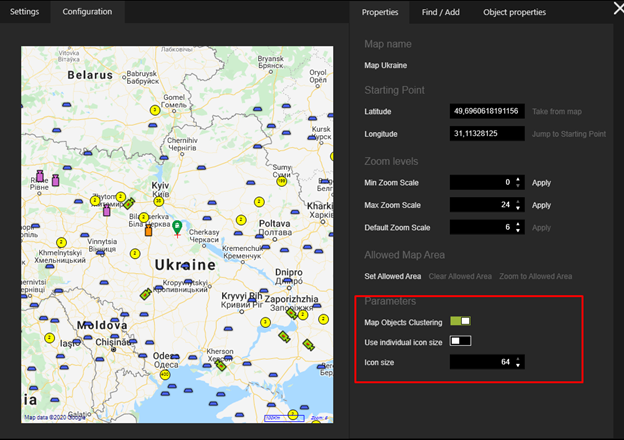
Parameters
In the Parameters settings area, you can define settings for the display of map objects in the GIS map control.
|
Options |
Description |
|---|---|
|
Map Objects Clustering |
Use this slider to enable or disable the grouping mechanism for Map objects of the GIS map. If the option is enabled, adjacent map objects will be merged into map object groupings to avoid overlapping. |
|
Use individual icon size |
Activate this slider to override the global size of map object symbols and map object grouping defined in the system settings and use an individual symbol size. This overriding of the settings can be done individually for each GIS map. |
|
Icon size |
Specify the individual symbol size for map objects and map object groupings. Changing this parameter can affect the grouping of map objects. |
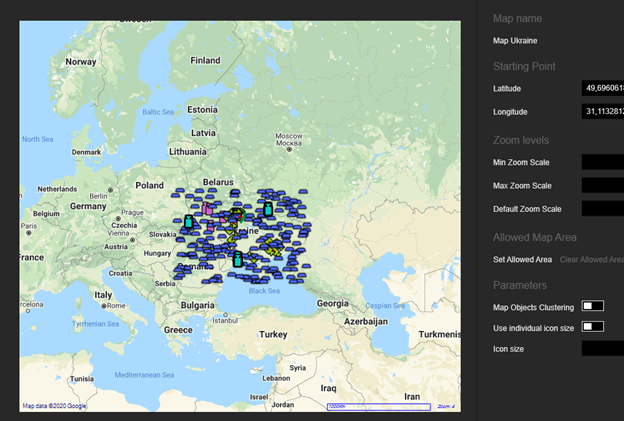
Map Objects Clustering
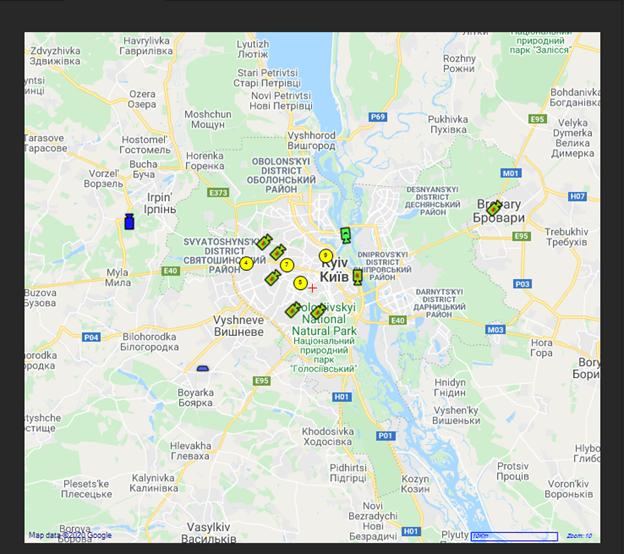
If the GIS map contains many map objects in certain regions, map objects may overlap at low zoom settings:
If the Map Objects Clustering option is enabled, all neighboring map objects are merged into one map object group. To zoom in and view all map objects contained in a grouping individually, the user can click on the respective grouping.
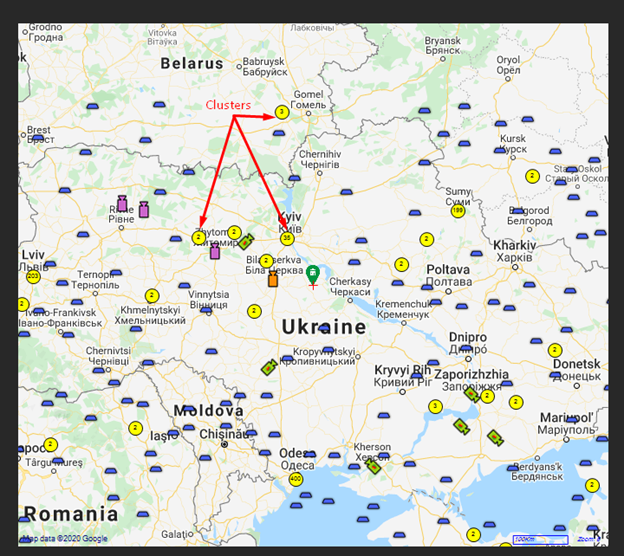
Sometimes it is not possible to display all map objects of a grouping in one view. In this case, smaller map object groupings are displayed:
Find / Add
The Find / Add tab contains the following setting areas Find Objects and Add Objects.
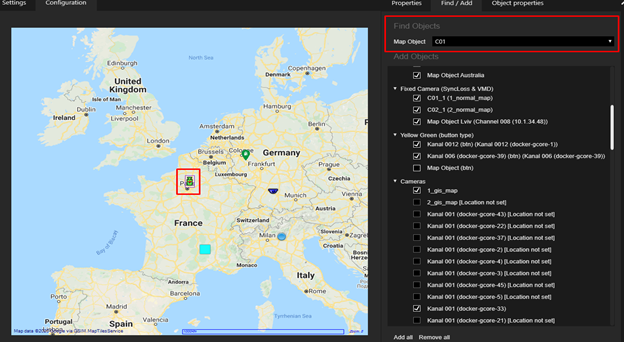
Find Objects
The Map Object drop-down lists contains the associated map objects. Select a map object from the list to display it on the map in the control area. Found map objects are marked with a purple frame.
If the found map object is in a map object grouping, the map is zoomed to Max Zoom Scale.
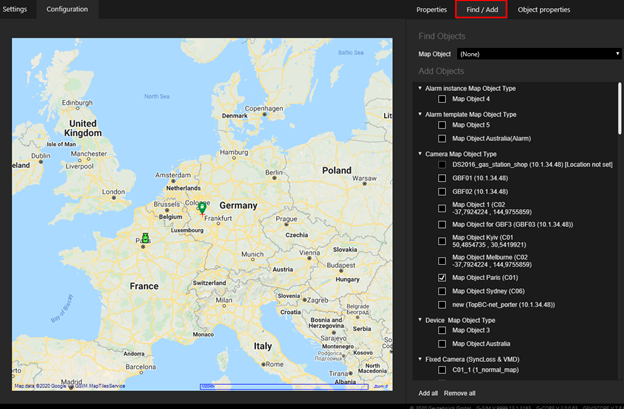
Add Objects
In this settings area you can add or remove map objects in the map by selecting or deselecting the respective map objects in the list. The Add all and Remove all buttons allow you to add or remove all map objects in the list with one click.
When adding map objects, you must keep the following in mind:
-
Only Map objects that have geographic coordinates (locations) can be added to the map.
-
If a Allowed Map Area is set, only map objects with geographic coordinates (locations) within the allowed map area can be added to the map.
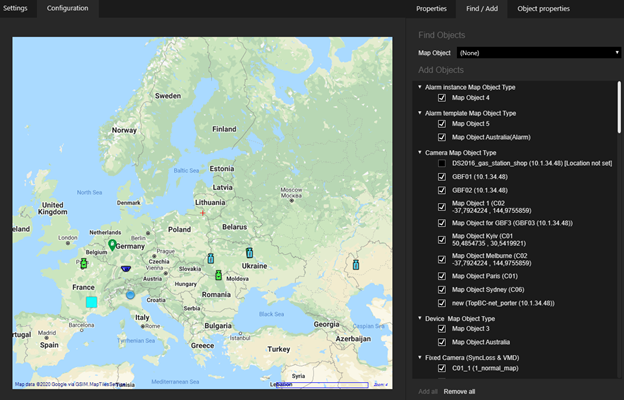
The added map objects are displayed in the GIS map control:
Object Properties
Click on a map object in the GIS map control to view its properties in the Object properties tab.
You can only edit the Primary Map Name setting.