Creating Cut Lists
Under the Cut Lists tab, you can create and export cut lists.
To be able to create cut lists, the privilege Create Cut Lists must be activated in the ManCon. It is possible to activate the privilege for User Groups and individual Users under the Cut Lists drop-down menu.
To change the default length of a cut list item, adjust the system setting Default Cutlist Item Length in Seconds in the ManCon (see System Settings).
In the cut list dialog, you can find the following buttons:
|
Button |
Name |
Description |
|---|---|---|
|
|
Apply to All |
Applies the time stamp of the selected cut list item to the other cut list items. |
|
|
Export |
Opens the dialog for the cut list export. |
|
|
Delete |
Deletes the entire cut list. |
|
|
Edit |
Edits the cut list data. |
|
|
Clear |
Deletes all items in the cut list. |
|
|
Order |
Orders the items chronologically. |
|
|
Locate |
Shows the active camera on the map. |
|
|
View all |
Shows all items in the selected viewer. |
|
|
View |
Shows the marked item in the selected viewer. |


Create Cut List
How to create a cut list:
-
Click on the
 icon. The editing area to create a cut list opens.
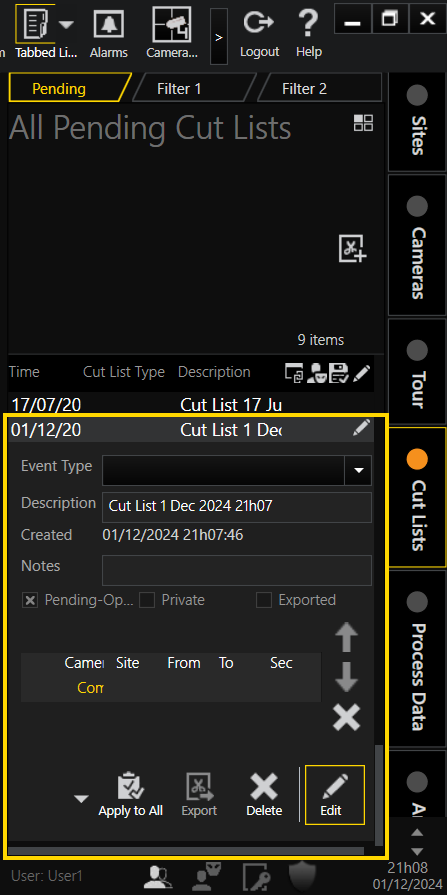
-
Adjust the following settings:
Setting
Description
Event type
Select an Event Type from the drop-down menu.
The event types are defined in the ManCon.
Description
A general name with date and time of creation is created by default. You can edit the Description.
Notes
Add explanatory notes if necessary.
-
Add items to the cut list. Here you have the following options:
-
To add an item to the cut list, drag a viewer into the field
 of the editing area. This way you can also add several items in a row.
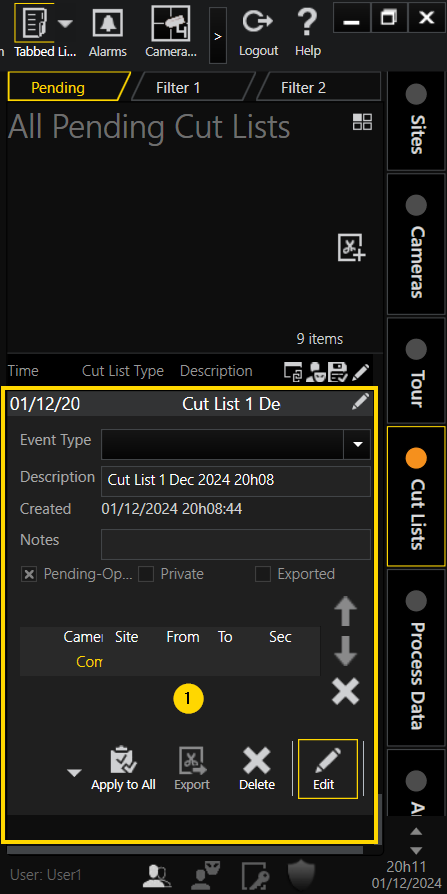
-
To add all viewers simultaneously as items to the cut list, click on the
 icon in the timeline.
Individual cut list items can be deleted with the
 icon next to the cut list.
 -
-
You can change the cut list order by using the arrows next to the cut list.
The order affects playback and export.
Define Time Range for Media Channel
You can define a specific time range for a media channel for which an item is to be added to the cut list.
-
Select the viewer.
-
In the timeline, click on the
 icon.
icon.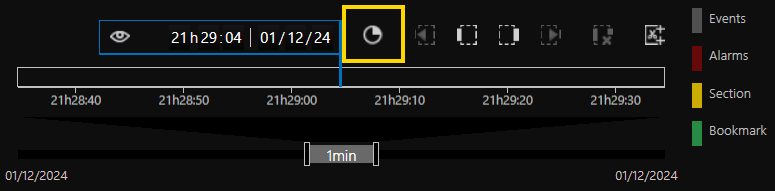
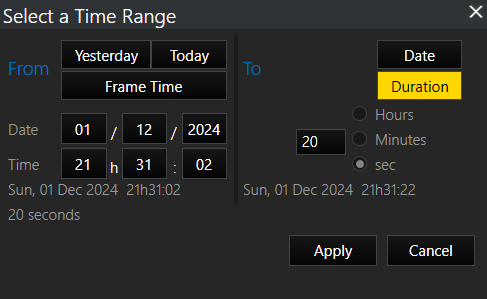
The dialog window Select a Time Range opens.
-
Make the required settings.
-
Click on the Apply button. The playback jumps to the start time of the set time range.
-
Drag the viewer into the field
of the cut list editing area.
The item with the respective time range was added to the cut list.
Create Cut List with Motion Search
With the Motion Search (MOS) functionality you can detect motions for which cut lists can be created. You can detect motions in live images (MOS Live) or in the background for a determined range of time (Background MOS).
To be able to use the MOS functionality, enable the privilege Motion Search (MOS) in the ManCon. Note that this privilege can be enabled for User Groups and individual Users.
MOS Live
With MOS Live, you can detect motions in live images. For the detected motions a cut list can be created.
How to create a cut list with MOS Live:
-
Activate the MOS Live function (see MOS Live).
-
Click on the
 icon.
icon.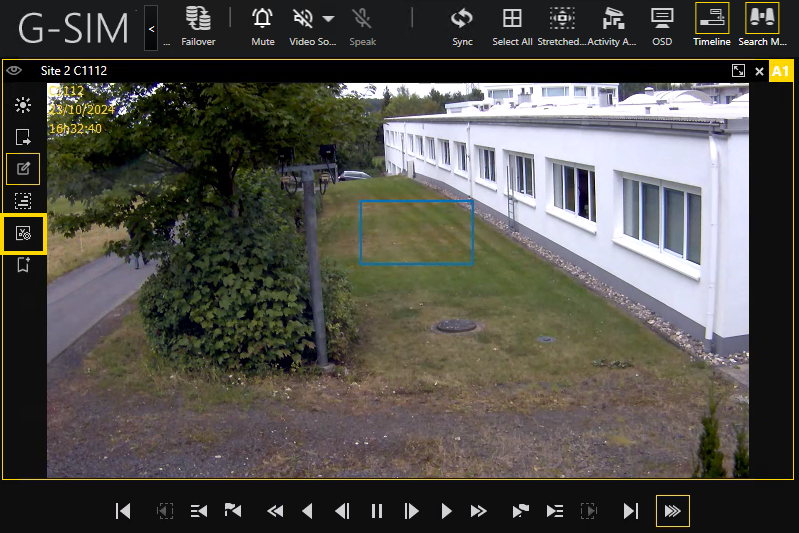
Every time a motion is detected, the respective image is added to the cut list.
If a new motion is detected and the recorded time falls into the current section of the cut list, nothing happens. If the recorded time is outside the current section time, a new section is added to the cut list. If you make any camera changes, such as zooming, pausing, etc., the current cut list is ended and the
 icon is deactivated.
Background MOS
With Background MOS, you can define an area and a time range in which motions are detected. The Background MOS runs in the background and automatically creates a cut list with the detected motions.
How to create a cut list with Background MOS:
-
Define an area in which motions are to be detected with the Background MOS (see Background MOS).
-
Click on the
 icon. The Background MOS menu opens.
-
Select a start and end date and time of the Background MOS and set the Motion Sensitivity.
-
Click on the Start Background MOS button. A cut list is created to which images with detected motions are added automatically while the set range of time.
If there are no results for the selected search, the dialog window There are no search results to show with the selected configuration or the G-Tect AD was not activated on G-Core side opens.