Scenes
Scenes are based on the available views. They supplement views with media channels.
In the Scenes menu a number of settings for each viewer can be configured (media channel assignment, playback mode, etc.). The interface includes the toolbar, a list of available views and their scenes ![]() and a settings area
and a settings area ![]() with a selection bar consisting of the tabs Scene, Connections, Options and Info, with which scenes can be edited.
with a selection bar consisting of the tabs Scene, Connections, Options and Info, with which scenes can be edited.
Toolbar
|
Icon |
Description |
|---|---|
|
|
Save settings |
|
|
Copy selected scene |
|
|
|
|
|
Add new scene |
|
|
Delete selected scene |


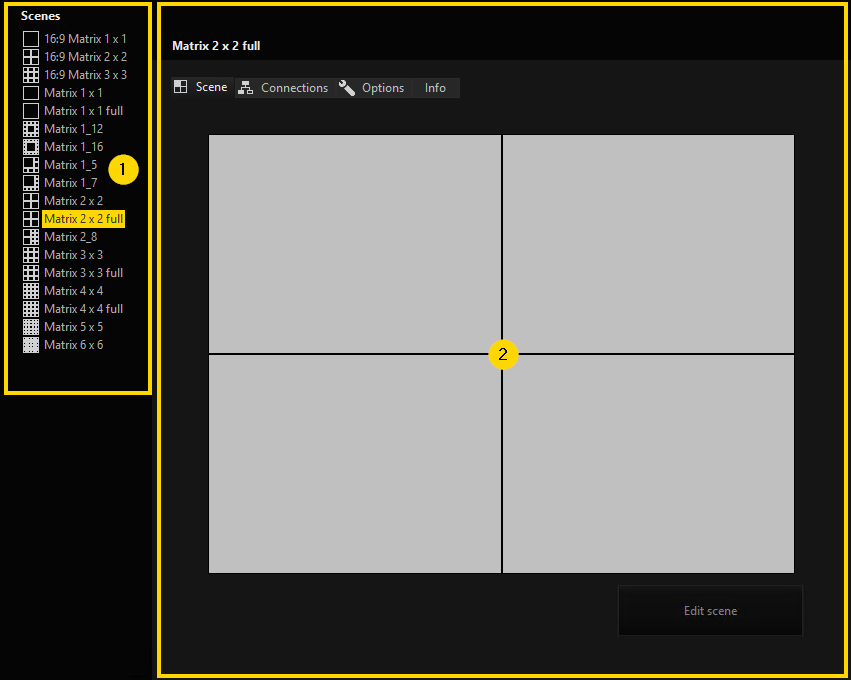
Create a Scene
Select the view you want to create a new scene for. Then create a new scene using the  button in the toolbar or select and right click a view in the list of available views and select Add. A new scene named New scene(No.) will be created and added to the selected view. The name can be changed by right clicking on the scene and choosing Rename.
Scene Settings
Scenes can be edited through settings that can be made in Scene, Connections, Options and Info of the selection bar in the settings area.
Scene
In Scene settings for each viewer, like media channel assignment, playback mode, etc. can be configured. Through the button Edit scene a new window opens, where these settings can be done.
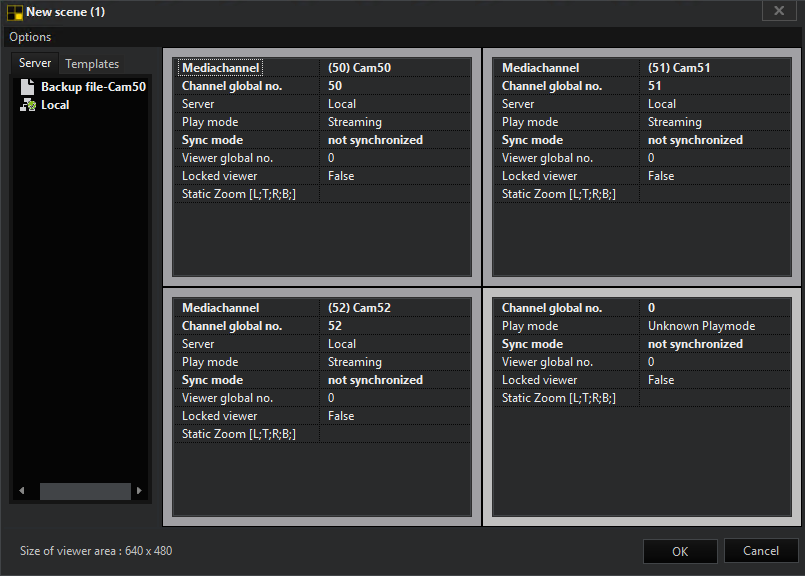
Using drag and drop media channels can be assigned to viewers.
You can also assign the viewer media channels when you are not connected with a server. To do this, simply enter the global number of the media channel.
IMPORTANT: If you are connected with multiple servers, and you have not coordinated the global numbers of the systems with one another, it is possible that the desired media channel does not appear, but rather the first channel found with the specified global number.
In the Options menu of the scene window are the four setting options: Template linking, Synchronization, Global viewer number and Static Zoom.
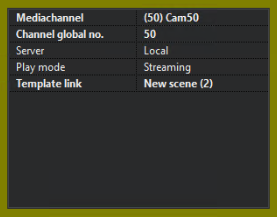
Template Linking
With activating Template linking different scenes can be connected.
In the scene window a new tab called templates appears. It displays a list of all views and scenes. By selecting a scene and dropping it to a viewer of the actual scene, you connect the scenes. The color of the viewer's border changes to green and an additional entry Template link appears.
Now, if the  icon in the toolbar is activated, the scene can be switched to a different scene by double-clicking the viewer the new scene is linked to.
Example In this example a template link from the large viewer in Scene_1 to the Scene_2 will be created. By double-clicking the large viewer in Scene_1 the scene will switch to Scene_2: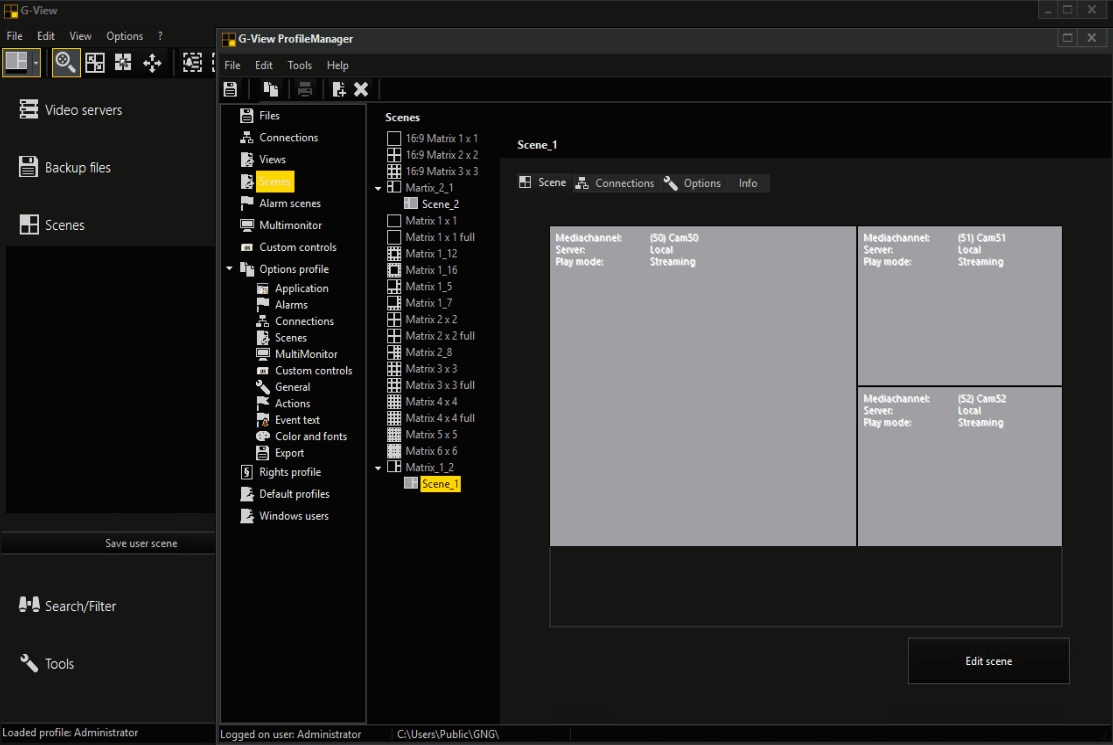
There is an additional option for linking: Select the Options tab in the profile manager. Under the Template Walker, enter the global number of a camera (e.g. 3) for the referenced viewer. Save the settings.
If in G-Viewer you then double-click on a viewer that displays the picture of a camera with the global number 3 (with template mode on), the scene is switched on.
Make sure that you have assigned the global numbers accordingly for the use of multiple servers. If you have not done this, then the setting will apply for every camera with the global number 3.
A template link can be deleted through the viewers context menu clicking Clear template link.
Synchronization
Sync mode: not synchronized, Sync master, Sync slave
Global Viewer Number
By activating Global Viewer Number you can set a global viewer numbers for your viewers.
Static Zoom
Information about Static Zoom in the chapter Static Zoom.
Connections
In Connections video server and backup file connections that will be established when applying the scene can be selected.
Options
The settings under points Appearance, Execution and Window are identical to those settings of the same name in views. More about the these settings under Options of views.
Info
In the Info setting tab a name and a description for the scene can be set.
To save all changes use the  button in the toolbar.