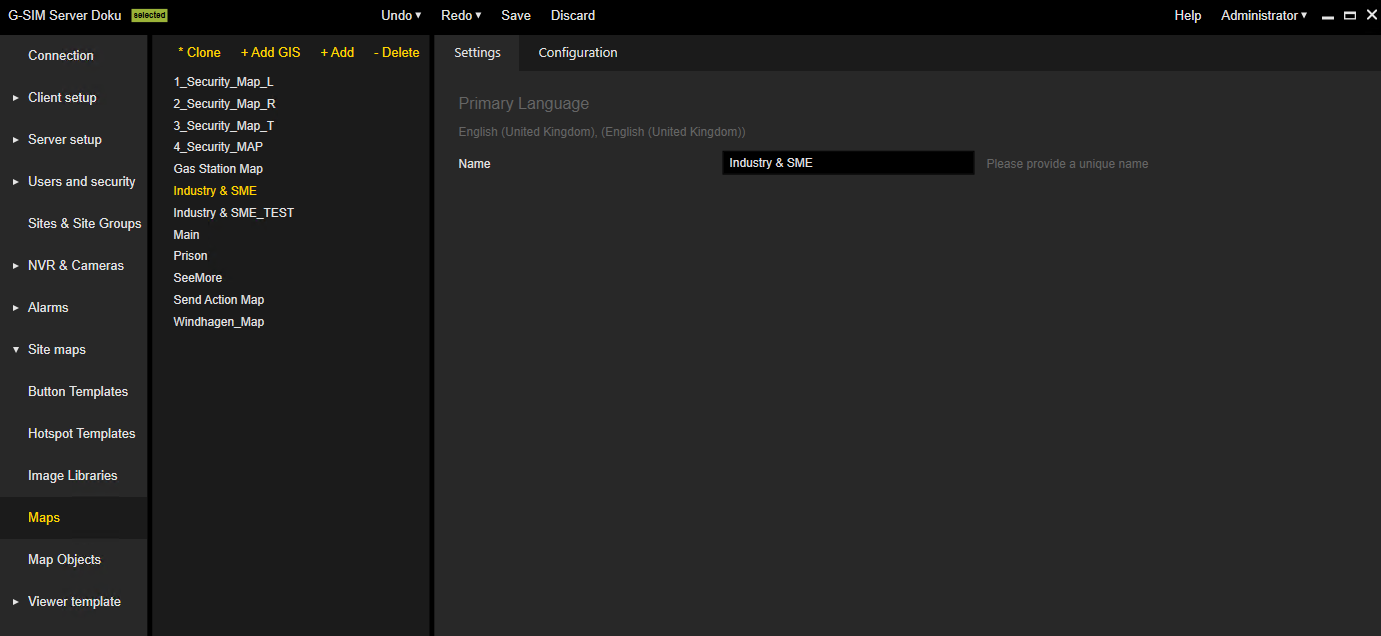
Maps
Settings
In the Settings tab, you can specify the name of the selected map. The map name is limited to 60 characters.
The name of the default map Main is not editable.
Configuration
In the Configuration tab you can configure the map and its objects. In the map editor area ![]() , you can see the map and its objects. Here you can select objects and change their order (see Object Properties). In the control area
, you can see the map and its objects. Here you can select objects and change their order (see Object Properties). In the control area ![]() , you can configure the map and its objects.
, you can configure the map and its objects.
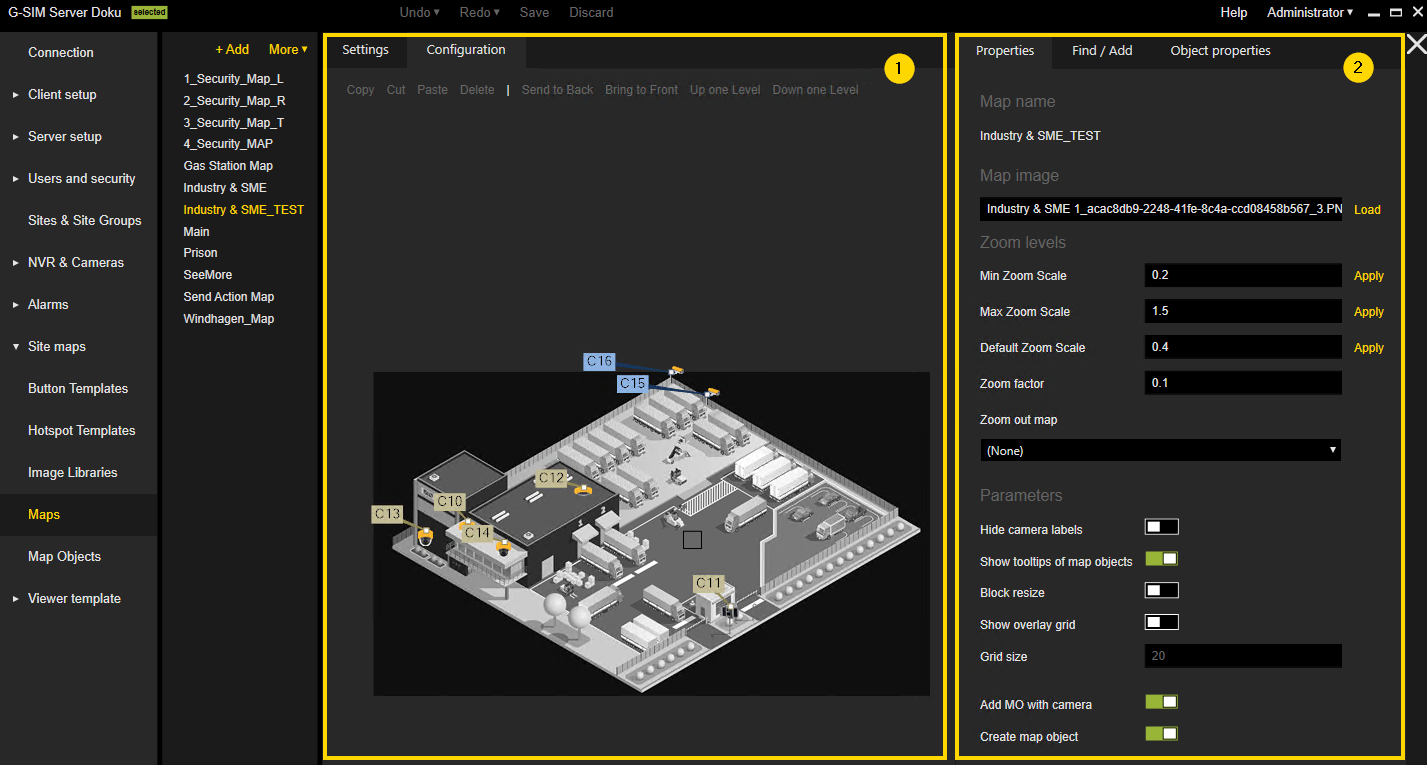
The settings in the control area are grouped in the following tabs:
Properties
The Properties tab contains the following setting sections:
Map name:
Displays the name of the selected map.
Map image:
Add the map image by clicking on the Load button.
Zoom levels:
|
Setting |
Description |
|---|---|
|
Min Zoom Scale / Max Zoom Scale |
Set the minimum zoom scale and the maximum zoom scale to define the allowable zoom range. |
|
Default Zoom Scale |
Set the zoom scale that is applied by default (on the map placed on the viewer). |
|
Zoom factor |
Set the zoom factor that is zoomed in each time you scroll with the mouse wheel. |
|
Zoom out map |
Specify the map that is displayed after exceeding the minimum zoom value (zoom out). |
Parameters:
|
Setting |
Description |
|---|---|
|
Hide camera labels |
Enable or disable the camera labels on the map. |
|
Show tooltips of map objects |
Enable or disable the tooltips of objects on the map in the OpCon. This setting is only displayed if under Server setup > System Settings > Operator Console the setting Show tooltips of Map Objects is activated. |
|
Block resize |
Enable or disable the map zoom for the “zoom to object” action. |
|
Show overlay grid |
Enable or disable the overlay grid on the map to place objects more precisely. |
|
Grid size |
Define the size of the overlay grid. |
|
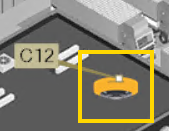
Add MO with camera |
Enable or disable adding an already existing map object (MO) (see Map Objects) with the creation of a camera label. When adding a camera label to the map, with this setting activated the corresponding map object of the camera label is automatically added to the map as well. It is displayed as the already configured map object icon:
The map object must be already created and configured under Site maps > Map Objects. If the map object does not yet exist when adding the camera label, it is displayed as follows:
Activate the setting Create map object to be able to create and configure new map objects under Site maps > Map Objects. |
|
Create map object |
Enable or disable creating a map object with the creation of a camera label. This setting can only be activated if the setting Add MO with camera is activated. When adding a camera label to the map, with this setting activated a new map object is automatically created on the map and is displayed as follows:
The map object is added under Site maps > Map Objects and must be configured there. |
Find / Add
The Find / Add tab contains the following setting sections:
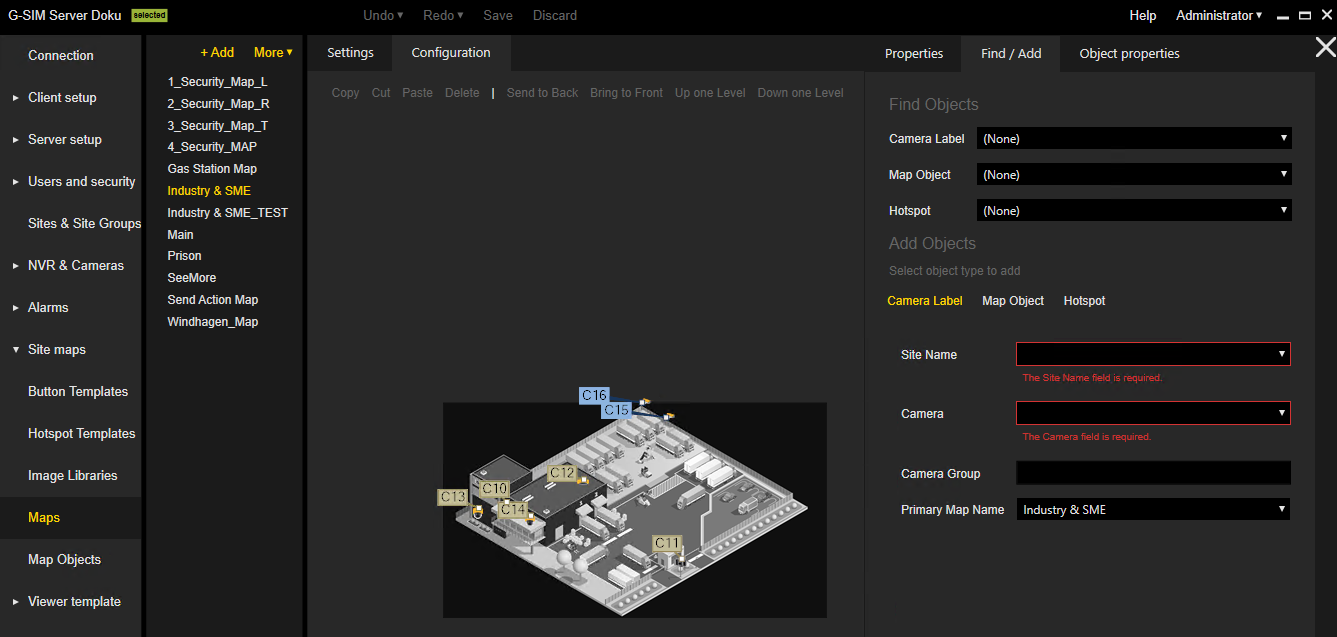
Find objects:
This setting section contains drop-down lists of the existing objects on the map. To find an object on the map, select the object from the corresponding drop-down menu.
|
Setting |
Description |
|---|---|
|
Camera Label |
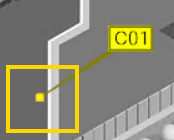
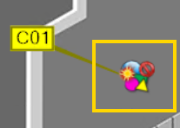
Find a specific camera label on the map. To configure the camera labels, you can select the name of the camera label from the Display Name Map drop-down menu under Mediasources. |
|
Map Object |
Find a specific map object on the map. To configure the map objects, see Map Objects. |
|
Hotspot |
Find a specific hotspot on the map. To configure the hotspots, see Hotspot Templates. |
Add objects:
To add an object to the map, select the object type Camera Label, Map Object or Hotspot. The corresponding settings are displayed. If the settings of the object are specified and valid, add the appropriate object to the map by using the mouse cursor.
Example In this example a Map Object is added to the map. The mouse pointer changes as soon as hovering over the map. The Map Object is added to the map by drawing a rectangle with the left mouse button. When releasing the mouse button, the Map Object is added.
The following settings are displayed depending on the selected object type:
|
Setting |
Description |
|---|---|
|
Site Name |
Select the name of the site. Sites can be created under Users and security > Sites & Site Groups (see Sites & Site Groups). |
|
Camera |
Select the name of the camera. |
|
Camera Group |
Indicates to which group the camera belongs. If a Camera Group was defined for the camera, the input field is automatically filled when selecting the Camera. Camera groups can be assigned under NVR & Cameras > Mediasources (see Mediasources). |
|
Primary Map Name |
Select the map name. By default, the name of the map on which the map object was placed when it was created is selected. |
|
Setting |
Description |
|---|---|
|
Map Object Type |
Select a Map Object Type. Map object types from third-party systems contain the system name in blue letters (see G-Connect). |
|
Linked Map Object |
Select a Linked Map Object. Here you have a selection of map objects which belong to the selected Map Object Type. |
|
Hide/Show map objects |
Select between three options:
|
|
Primary Map Name |
Select the map name. By default, the name of the map on which the map object was placed when it was created is selected. |
|
Setting |
Description |
|---|---|
|
Polygon Hotspot |
Activate / deactivate this option to add a Polygon Hotspot. With this option you can define a frame other than a rectangle. |
|
Name |
Enter a name for the hotspot. |
|
Text on Hotspot |
Enter a text which is shown as a tooltip on the hotspot when being in the OpCon. |
|
Destination |
Select the destination of the hotspot. This setting is used to link to the hotspot on another map. When being in the OpCon and clicking on the respective hotspot on the map, the view changes to the set destination map considering the set map zoom. |
|
Set Zoom |
Define an area to be zoomed into. |
|
Site Name |
Select the name of the site. Sites can be created under Users and security > Sites & Site Groups (see Sites & Site Groups). |
|
Template |
Select a hotspot template. Hotspot templates can be created under Site maps > Hotspot Templates (see Hotspot Templates). |
|
Override Default Zoom |
Activate this checkbox to be able to change the Zoom Factor. |
|
Zoom Factor |
Change the Zoom Factor. This setting refers to the zoom factor when opening the respective map in the OpCon. It enables you to make quick zooming when the mouse is on the hotspot. |
|
Auto Switch |
Activate this checkbox to be able to change the Zoom Scale. Is only displayed if the option Polygon Hotspot is activated. |
|
Zoom Scale |
Change the Zoom Scale. This setting enables you to switch to the Destination map when you are zooming the current map over the hotspot. Only if the Zoom Scale of the current map is greater or equal 1.5, you can automatically switch to the Destination map. Is only displayed if the option Polygon Hotspot is activated. |
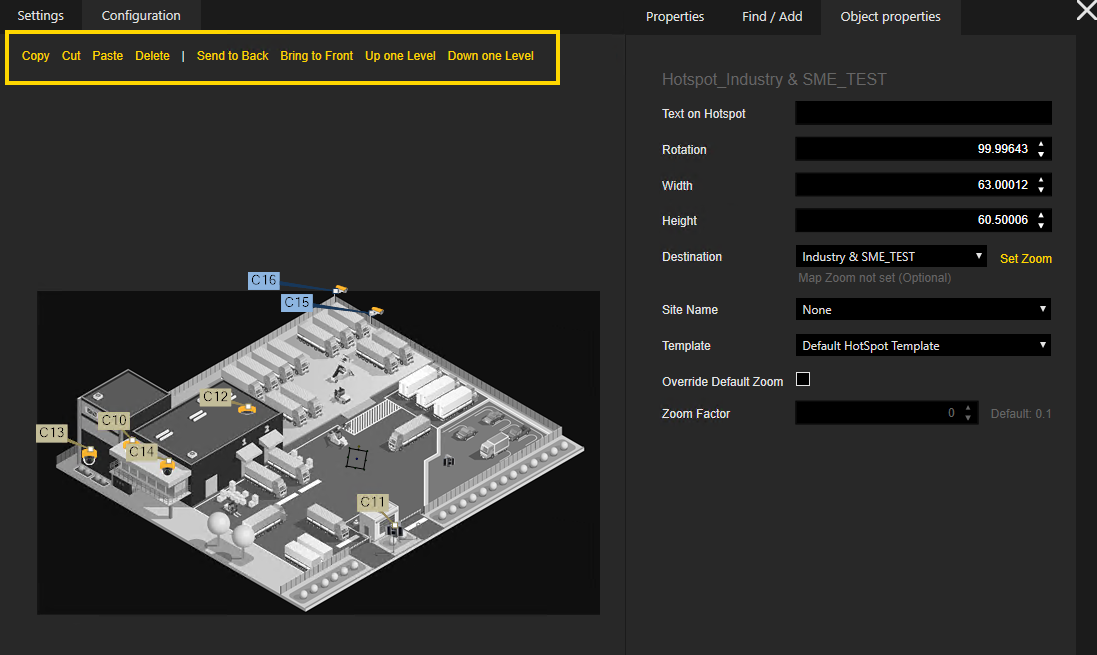
Object Properties
Select an object on the map to configure the corresponding Object properties.
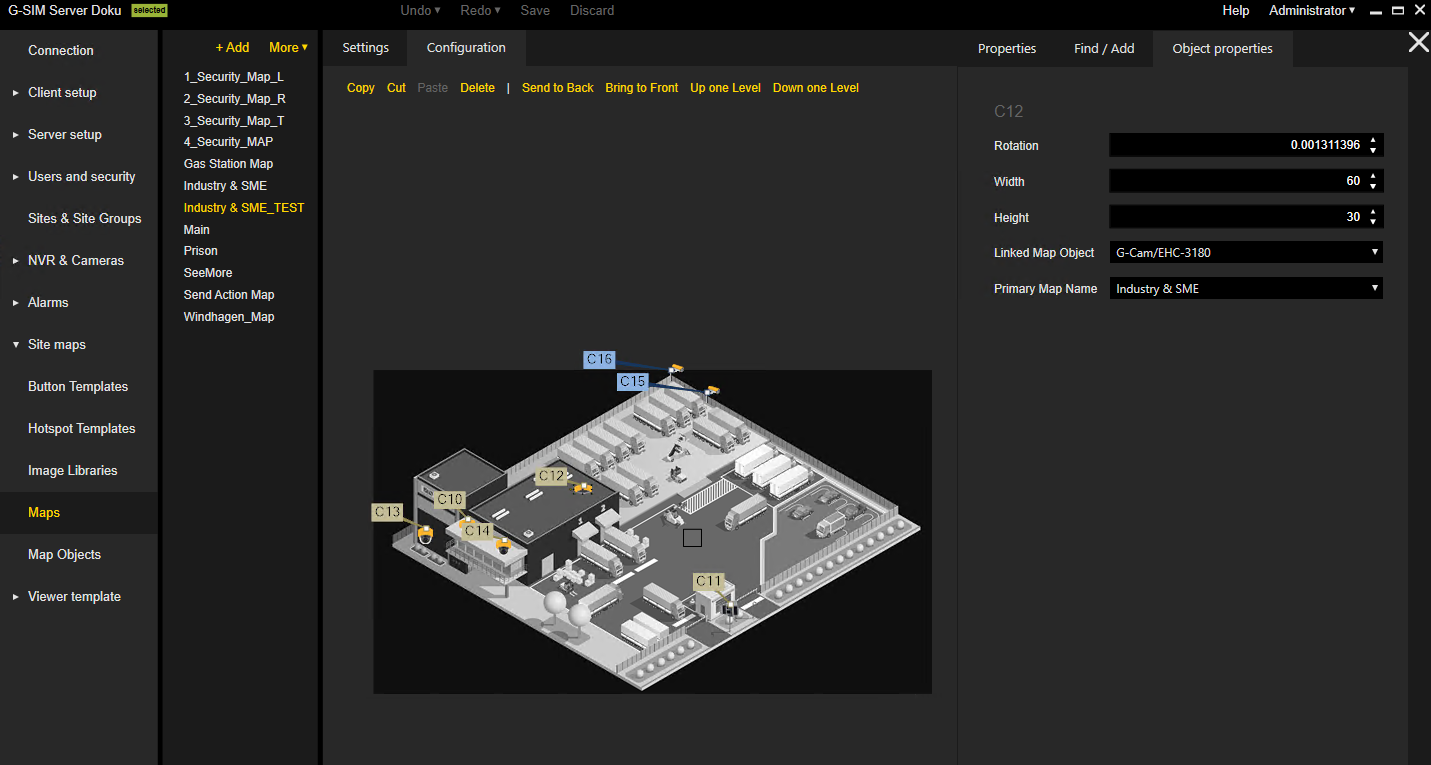
The set of properties depends on the object type:
|
Setting |
Description |
|---|---|
|
Rotation |
Set the Rotation value for the map object visualization. If the rotation value is 360 or more, 360 is deducted from the rotation value. Consequently, a value of 360 would be displayed as 0 and a value of 520 as 160. |
|
Width |
Set the Width value for the map object visualization. |
|
Height |
Set the Height value for the map object visualization. |
|
Linked Map Object |
Select a Linked Map Object. Here you have a selection of map objects which belong to the selected Map Object Type. This property cannot be edited using bulk change. |
|
Primary Map Name |
Select the map name. By default, the name of the map on which the map object was placed when it was created is selected. |
|
Setting |
Description |
|---|---|
|
Site Name |
Select the name of the site. Sites can be created under Users and security > Sites & Site Groups (see Sites & Site Groups). This property cannot be edited using bulk change. |
|
Camera |
Select the name of the camera. This property cannot be edited using bulk change. |
|
Camera Group |
Indicates to which group the camera belongs. If a Camera Group was defined for the camera, the input field is automatically filled when selecting the Camera. Camera groups can be assigned under NVR & Cameras > Mediasources (see Mediasources). |
|
Primary Map Name |
Select the map name. By default, the name of the map on which the map object was placed when it was created is selected. |
|
Auto Size |
Select this checkbox to let the camera labels be displayed on the map in automatic size. |
|
Setting |
Description |
|---|---|
|
Text on Hotspot |
Enter a text which is shown as a tooltip on the hotspot when being in the OpCon. This property cannot be edited using bulk change. |
|
Rotation |
Set the Rotation value for the object visualization. |
|
Width |
Set the Width value for the object visualization. |
|
Height |
Set the Height value for the object visualization. |
|
Destination |
Select the destination of the hotspot. This setting is used to link to the hotspot on another map. When being in the OpCon and clicking on the respective hotspot on the map, the view changes to the set destination map considering the set map zoom. This property cannot be edited using bulk change. |
|
Set Zoom |
Define an area to be zoomed into. This setting applies to both rectangle and polygon hotspots. The set zoom is only applied in the OpCon if the Destination map and the current map are the same. If they are different maps, the set zoom is ignored. |
|
Site Name |
Select the name of the site. Sites can be created under Users and security > Sites & Site Groups (see Sites & Site Groups). This property cannot be edited using bulk change. |
|
Template |
Select a hotspot template. Hotspot templates can be created under Site maps > Hotspot Templates (see Hotspot Templates). |
|
Override Default Zoom |
Activate this checkbox to be able to change the Zoom Factor. Is only displayed in the case of a non-polygon hotspot. |
|
Zoom Factor |
Change the Zoom Factor. This setting refers to the zoom factor when opening the respective map in the OpCon. It enables you to make quick zooming when the mouse is on the hotspot. Is only displayed in the case of a non-polygon hotspot. |
|
Auto Switch |
Activate this checkbox to be able to change the Zoom Scale. Is only displayed in the case of a polygon hotspot. |
|
Zoom Scale |
Change the Zoom Scale. This setting enables you to switch to the Destination map when you are zooming the current map over the hotspot. Only if the Zoom Scale of the current map is greater or equal 1.5, you can automatically switch to the Destination map. Is only displayed in the case of a polygon hotspot. |
Adjustments to the map and its objects:
In the toolbar of the map editor area, you can find various buttons to change the position and the order of overlapping of objects:
|
Button |
Description |
|---|---|
|
Copy / Cut |
Copy or cut an object from the map to paste it either into the same or another map. Instead of using the corresponding button, you can use the common shortcuts to copy or cut objects. You can also copy or cut several individual or all objects:
|
|
Paste |
Paste copied or cut object(s) into the same or another map. Instead of using the corresponding button, you can use the common shortcut. |
|
Delete |
Delete an object from the map. Instead of using the corresponding button, you can use the delete key on your keyboard. You can also copy or cut several individual or all objects:
|
|
Send to Back |
Place an object in the background. |
|
Bring to Front |
Place an object in the front. |
|
Up one Level |
Place an object one level higher. |
|
Down one Level |
Place an object one level lower. |
Configure the object properties with bulk change:
You can either select several individual or all objects:
-
Select individual objects: Click and hold
Ctrland select the objects with left click. -
Select all objects: Use the shortcut
Ctrl + A.
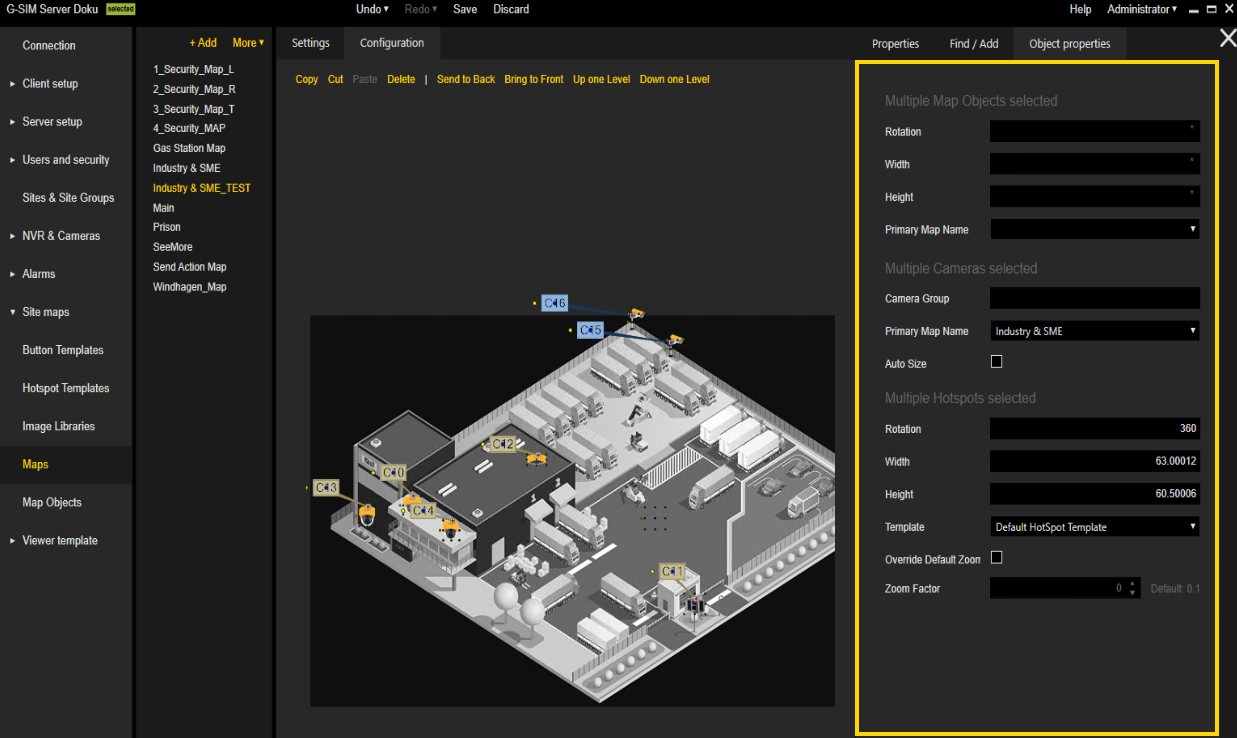
You cannot edit all properties with bulk change. When selecting different object types, only those properties that are available for all selected objects can be edited.
An asterisk indicates that multiple objects of the same type have different values. With combo boxes different values are indicated by an empty field. If they have the same value, the respective value is displayed.